Hot and Fast Brisket: Great Flavor Without the Wait
Updated October 2026.
I know that “low and slow” (a long cook at a low temperature) is the gold standard for brisket.
So why should you even consider cooking brisket hot and fast?
If you tried to consume all that has been written and preached about the best way to smoke a brisket low and slow, you would be exhausted. And you could have smoked enough briskets to feed your whole town. No matter where or how you learned to smoke a low and slow brisket, or who taught you, the method requires one key ingredient: patience. Patience is a nice way of saying it takes hours before you are eating any brisket.
Why Cook Brisket Hot and Fast?
So what’s with the hot and fast method? Time, that’s what. Maybe you don’t have the time for low and slow, but you still want brisket. I have prepared brisket low and slow and hot and fast on a variety of smokers and grills, so I feel I can share some insight on the hot and fast controversy.
Photo Credit: Steve Nestor
Is a low and slow smoked brisket better? Yes. But a hot and fast brisket is better than no brisket at all! For my first attempt at smoking a brisket, I used the hot and fast method since I did not have time for low and slow. I was a novice, and I smoked my first brisket on a kettle grill at 400°F for about 4 hours. I thought it was awesome. I thought it was delicious, but I did not know any better.
Years later, I was attending Barbecue University and asked Steven Raichlen about the hot and fast method. He told me he was authoring a whole book on brisket and suggested I try it so we could compare it to low and slow. If you’re interested in our results, check out “Brisket in a Hurry” on page 82 of Steven Raichlen’s The Brisket Chronicles.
Since my first brisket, I have cooked briskets on a kettle grill, a Pit Barrel Cooker, a Big Green Egg, a pellet smoker, and an offset barrel smoker (aka stick burner). I usually select the low and slow method, but sometimes I just want brisket, and I do not want to wait all day or get up in the middle of the night to start it. Other times, I want brisket for another use.
I have used brisket in nachos, hash, jalapeño poppers (Texas Twinkies), chili, ragu, and tacos. I can appreciate that most people do not cook brisket just for other recipes, and it is rare that there is leftover brisket. But smoky, beefy, succulent brisket will boost the flavor of other dishes.
Photo Credit: Steve Nestor
Our Hot and Fast Brisket Test
At Barbecue University in 2024, Steven and the team were comparing two methods for wrapping brisket. We wrapped one brisket in butcher paper (the Aaron Franklin method) and the other in aluminum foil (the Tootsie Tomanetz method). You can read the results of our brisket wrapping comparison. Early in the morning, we realized that even with two briskets, we might not have enough for all the students. I suggested that we revisit our hot and fast experiment and cook two more briskets. Steven gave me the go-ahead.
Photo Credit: Steve Nestor
Cooking Hot and Fast Brisket
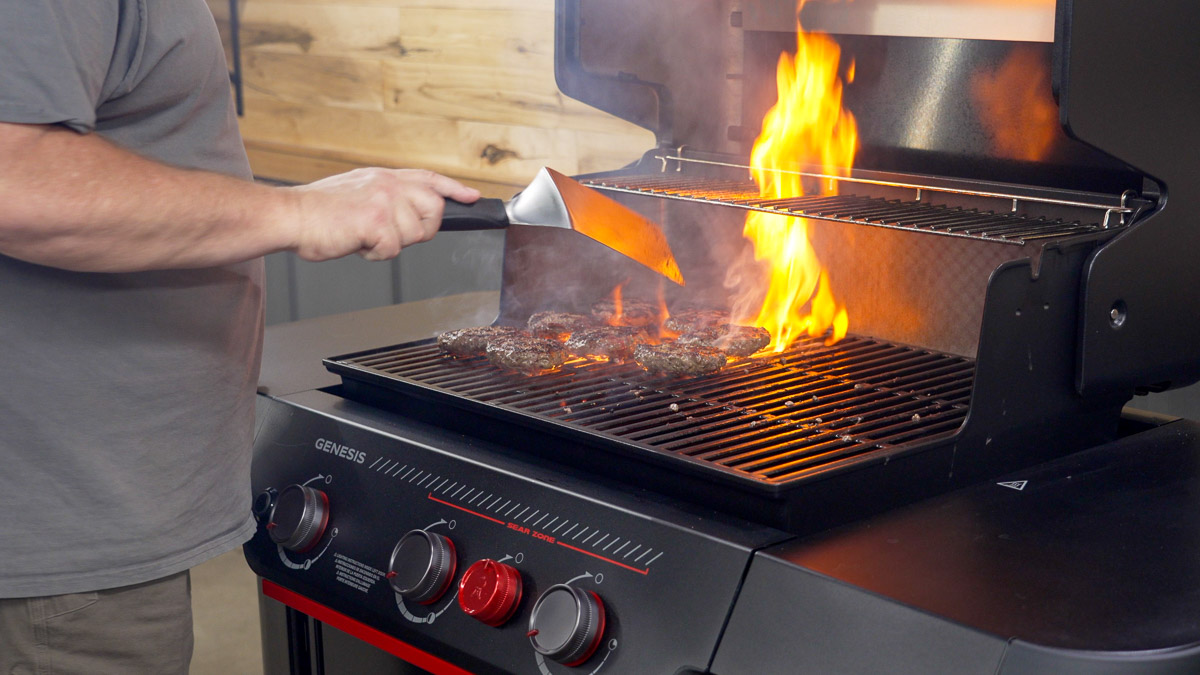
I quickly trimmed two briskets and seasoned them with Steven’s Texas Brisket rub. I decided to use the Weber SmokeFire for a few reasons. I would not have to babysit the briskets while helping the students, the smoke would be consistent, and it would reach a temperature of 400°F.
Once the briskets reached an internal temperature of 165°F on the ChefsTemp instant-read thermometer, I wrapped one in butcher paper and one in aluminum foil. Total cooking time was about 4 hours.
The briskets did not jiggle like they would if they were smoked low and slow. When I probed them with the instant-read thermometer, they still felt a little tight despite the temperature reading of 203°F. The briskets then rested for about an hour and a half before it was time to slice them up for lunch.
Photo Credit: Steve Nestor
What to Know Before Trying Hot and Fast Brisket
Allow time for the rest, too. Our briskets smoked for about 4 hours, then rested for another 90 minutes before slicing. That was our result for this test, not a timetable for every brisket.
Pay attention to texture as well as temperature. Our briskets reached 203°F but still felt a little tight when probed. That detail matters when deciding whether the shorter smoking time gives you the result you want.
The Results: How Did Hot and Fast Brisket Compare?
Now, if you have never eaten brisket, you might be impressed with a hot and fast brisket. It was smoky and luscious, and the bark was flavorful and crusty. Both the flat and the point developed a nice smoke ring. Thinly sliced flat would be ideal in a sandwich. The point was moist and smoky, as you would expect. Due to the shortened smoking time, not all the intramuscular fat rendered from the brisket, but it still had a luscious mouthfeel.
We all enjoyed sliced brisket for lunch, and to our surprise, there were leftovers. I quickly wrapped up slices of brisket to make hash the next morning for Steven and the team. Check out “Brisket for Breakfast? You Bet!” to see how I made hash with the leftover brisket.
Photo Credit: Steve Nestor
I do not expect to convert Planet Barbecue to the hot and fast method, but there will come a day when you just need more brisket or you need brisket in a hurry, and I hope you will remember hot and fast brisket.
Plan your next cook with our full recipe collection—weeknight grills, weekend projects, and special-occasion feasts.
Get Steven’s weekly grilling tips, seasonal recipes, and live-fire ideas in your inbox. Join our Up in Smoke newsletter. Sign up and get a FREE PDF of Steven Raichlen's Best Ribs Recipes Ebook.
Preorder Man On Fire — A Steven Raichlen Memoir. And get some really cool rewards!
Looking to upgrade your tailgating setup? Check out our Tailgating Essentials.
The post Hot and Fast Brisket: Great Flavor Without the Wait appeared first on Barbecuebible.com.
https://barbecuebible.com/2026/10/30/hot-and-fast-brisket/
#brisket #fast #wait #steven #stevenraichlen #barbecueuniversity #cook
#rss #feeds #linksharing #qwibbit
#brisket
#fast
#wait
#steven
#stevenraichlen
BBQNotes23h
The 5 Best Grill Smoker Combos of 2026
Most grill smoker combos make you give something up. Some sear great but can’t hold 225°F for a long smoke. Others turn out beautiful ribs and can’t put a decent crust on a steak.
These are the ones we’d actually buy, from set-and-forget pellet grills to budget charcoal, each tested by our team.
BEST OVERALL
Weber Searwood 600 Pellet Grill
Why we picked it
CHECK LATEST PRICE
BEST CHARCOAL
Masterbuilt Gravity Series XT Charcoal Grill and Smoker
Why we picked it
CHECK LATEST PRICE
BEST DUAL FUEL
Oklahoma Joe's Canyon Combo Grill & Smoker
Why we picked it
CHECK LATEST PRICE
BEST BUDGET
Weber Kettle Premium 22 Inch Charcoal Grill
Why we picked it
CHECK LATEST PRICE
BEST KAMADO
Kamado Joe Classic II 18 Inch
Why we picked it
CHECK LATEST PRICE
UPDATED OCT 29, 2026: Rebuilt around our latest hands-on testing and video, with new picks by grill type, bonus picks.
How we tested
We test every grill the way you’d use it at home. We check preheat times, max searing temps, and side-to-side spread with probes across the grate, then cook ribeyes and burgers hot and ribs and brisket low and slow, usually unwrapped.
We also clean, store, and keep cooking on each one, and read what owners say in the comments about how theirs held up.
The picks are grouped by type because that’s the decision that matters most. Pellet and gravity-fed grills run the fire for you, dual fuel pairs gas for speed with charcoal for flavor, and kettles and kamados give the most flavor for the money if you’ll run the fire yourself. Choose the type first, then the model.
1. Best Overall – Weber Searwood Pellet Grill
Read our full Weber Searwood 600 review.
CHECK PRICE AT LOWE’S
CHECK PRICE AT BBQ GUYS
Every pellet grill handles low and slow cooks, and most can grill up chicken and do it well.
We judge a pellet grill on how it handles a steak, and the Searwood can crank one out. When friends or viewers ask us for a beginner-friendly pellet grill that does low and slow and grilling, this is the one we point them to. It does both really well with very little effort from you.
It’s our best overall pick because it costs a lot less than a premium gravity-fed unit like the XT. If you want one pit, don’t want to babysit a fire, and still want a real sear, start here.
What makes it a real grill is how it’s built. Weber‘s DirectFlame design lets the fire reach the grates across the whole cooking surface, so you get a sear everywhere instead of in one small zone, and you can grill with the lid open.
In our full Searwood review, it hit 600°F in about 13 minutes and reached smoking temp in under 10.
It does run around 30°F hotter on the right side (up to 50°F at startup), so we rotated our no-wrap ribs partway through. They came out juicy with good smoke flavor.
For most people, it could stand in for a gas grill, and aftermarket grates will get you better sear marks.
It comes in two sizes. The Searwood 600 has 648 square inches of total cooking space, which is plenty for most families, while the 600 XL bumps that to 972 and adds a pellet level gauge.
The add-ons are where it pulls away from other pellet grills. Drop in the griddle and you can do smash burgers. Add the rotisserie and you can spin a chicken one day and smoke beef ribs the next. You can even rotisserie a prime rib on it. We’d be surprised if other brands aren’t working on their own rotisserie right now.
Cleanup is one of its biggest pros. Scrape the grates and pull out the bottom pan. We never felt the need for a shop vac on the firepot. Budget for the folding front shelf or side table, though, because it doesn’t come with any prep space.
What we liked:
Grill on the entire surface – The whole surface of the grill gets direct flame for high heat searing
Great sear – Meat cooked had a great sear, although for the best sear marks you’ll want to get some aftermarket grates
Open lid grilling – Put the grill in manual mode, and it pumps out enough pellets to grill with the lid open
Add griddle and rotisserie options – The first pellet grill we’ve tested that allows you to swap out the grates for a full griddle surface or add a rotisserie.
What we didn’t like:
Hot and cold zones – You’ll definitely still want to rotate meat around when grilling as it gets hotter on the right hand side.
Front and side tables are not included – Like with a Traeger, you’ll have to pay extra to get decent prep areas.
We’ve always told people pellet grills are smokers first and foremost, but with the Searwood, you can confidently ditch the gas grill and run this single pit for everything.
Weber Searwood 600 Pellet Grill
4.5
The Searwood is the pellet grill we’d pick if you want one pit for both jobs. It smokes with almost no effort and sears across the whole grate.
CHECK LOWE'S PRICE
CHECK BBQ GUYS PRICE
2. Best charcoal grill smoker combo: Masterbuilt Gravity Series XT
Read our full Masterbuilt Gravity XT Review.
CHECK LOWE’S PRICE
CHECK BBQ GUYS PRICE
Gravity-fed smokers do a fantastic job smoking and a fantastic job grilling, and the big bonus is that they’re PID-controlled. You get charcoal flavor with barely any work. You load the hopper, set a temp, and the fan feeds air to keep it there, much like a pellet grill.
The difference is you’re burning charcoal and real wood chunks.
Masterbuilt is the brand that made gravity-fed charcoal popular in the box stores, and it has the widest range, from entry-level units up to the XT. Char-Griller and Oklahoma Joe’s now make their own versions.
In our tests, the XT took about 30 minutes to hit 700°F. At smoking temps, it ran only 10 to 20°F off from left to right once it settled, which is impressive for a charcoal cooker. St. Louis ribs took about 4.5 hours and beef plate ribs about 6 hours unwrapped, and everything we smoked and grilled on it tasted great.
The biggest complaint people have about gravity-fed units is build quality, and that’s fair for some of the older models. The XT is up about three notches with a double-wall body, a gasketed lid, and stainless grates.
Most of the failure stories readers shared with us (switches, control boards, fans) involve older Gravity models, and the XT’s upgrades are why we pick it as our charcoal pick over the cheaper units, although you pay a premium for that build quality. We wish the XT was priced a few hundred cheaper as that would make it a true contender.
Some owners report temperature spikes. In our experience, that usually comes down to wood chunk placement. Too much wood at once and you’ll get a spike when it ignites, though the controller will notice and slow the fan.
The biggest con is fuel use. Grilling at 600 to 700°F burns through charcoal, and a kamado or even a kettle is far more efficient. Open the lid, and the extra airflow spikes the temps, so pause the fan if you’re working the grill for a while.
We’d love to see a lid switch on future models. If you’re storing it for a while, clean the ash out of the hopper and give the inside a light spray of cooking oil to help prevent rust.
What we liked
Charcoal flavor without babysitting – The controller and fan hold your set temp while you get on with your day.
Gets properly hot – It reached 700°F in about 30 minutes for searing.
Even temps – Only 10 to 20°F side to side once it settled.
Better build – Double-wall body, gasketed lid and stainless grates.
What we didn’t like
Fuel hungry – Grilling at 600 to 700°F burns through charcoal.
Lid-open spikes – Pause the fan if the lid’s going to be up for a while.
Masterbuilt Gravity Series XT Charcoal Grill and Smoker
4.6
Our Verdict: The Masterbuilt Gravity XT refines everything we liked about the original, with better insulation, smoother airflow control, and easier digital operation. It delivers true charcoal flavor with pellet-grill convenience. The price is higher, but the upgrades make it a worthwhile step up.
CHECK LOWE'S PRICE
Check BBQ Guys PRICE
3. Best dual fuel: Oklahoma Joe’s Canyon Combo
This is the Swiss Army knife of grills, with three ways to cook. One side is a propane grill with three burners and push-button ignition. The other side has a charcoal chamber for direct grilling, or you can fire up the offset firebox on the end to turn it into a small offset smoker.
The firebox has its own grates, so you can grill over it too, for 1,031 square inches of cooking space in total.
The gas side preheats in 6 to 7 minutes. In our burger test, the gas burgers were done in 15 minutes and passed for a weekday dinner. The charcoal side took 40 minutes from lighting the chimney, but those burgers were busting with smoky flavor. It comes down to whether you have 40 minutes or 20 before kickoff.
Cooking on it as an offset can get a little tricky. These small chambers get really hot really fast and can swing hard, so instead of running back and forth adjusting vents all day, we control temps with fuel.
We spread 20 to 25 briquettes in the firebox, scatter a few chunks of post oak on top, then pour about 15 lit briquettes into one corner. When temps drop about 25°F, in go another 10 to 15. Don’t keep opening the lid, either. More air just makes the fuel burn faster.
Our beef ribs ran about 6 hours unwrapped, mostly at 250 to 275°F, and those beefers were juicy, with a great smoke ring and bark.
At 184 pounds, it’s big and heavy, though the wagon wheels roll smoothly.
For a lot of people, a dual-fuel grill is a stepping stone. If you can run this offset, you can run a handcrafted one later, and some owners decide tending a firebox is too much tinkering and move to pellet. That learning curve is the biggest con, but charcoal and wood give you a little better flavor.
What we liked
Three ways to cook – Gas, direct charcoal grilling and offset smoking on one cart.
Fast gas side – Ready to cook in 6 to 7 minutes on a weeknight.
Real smoke – Our beef ribs came out with a great smoke ring and bark.
Handy middle shelf – A safe spot to park a hot chimney.
What we didn’t like
Offset learning curve – The small chamber heats fast and swings, so expect a few practice cooks.
Heavy – At 184 pounds, it’s not moving far.
Oklahoma Joe's Canyon Combo Grill & Smoker
The Canyon Combo is the most versatile pit here, with gas for weeknights and charcoal or offset smoke for weekends. The offset takes some practice, but if you want to learn fire management without giving up quick dinners, it's a great place to start.
CHECK LOWE'S PRICE
CHECK AMAZON PRICE
4. Best Budget Grill Smoker Combo – Weber Original Kettle Premium 22″ Charcoal Grill
Read our full Weber Original Kettle 22″ Review.
CHECK PRICE AT LOWE’S
CHECK PRICE AT BBQ GUYS
Everyone knows a kettle makes a great grill. Fewer people realize that with a couple of tricks, it’s a formidable smoker too. When someone on a tighter budget asks us what grill can do both, we always say a kettle, with a reminder that it takes a little practice.
Our pick is the Weber Original Kettle Premium 22“. It costs only a little more than the base Original Kettle, and the high-capacity ash catcher alone is worth it, because cleanup is the kettle’s biggest chore. It’s been around since 1952, the porcelain-enameled steel resists rust, and it seals well enough to hold steady temps on less fuel.
The great thing about cooking on charcoal is the flavor. A ribeye over charcoal is hard to beat. Light a chimney, bank the coals, and you have a hot zone for searing and a cool zone for finishing.
For low and slow, the Slow ‘N Sear basket is the accessory we’d buy first. It keeps the coals on one side with a water reservoir beside them, and we’ve produced some really good barbecue with it. Throw in a couple of wood chunks, and you get that traditional smoky flavor.
You can also learn the snake method. It takes longer to set up, and when you light it, it doesn’t always follow the snake.
The main thing to remember is to make small adjustments. If your temp drops 10°F, don’t crank the vents wide open, or you’ll be closing them again to bring it back down. Or add a fan controller. A good one can cost about as much as the kettle, so it’s a nice-to-have, not a must-have.
Temperature control is the big one. Until you dial it in, you might get a little frustrated. Cleanup is more involved too because you’re dealing with ash after every cook. Cold ash can go in the garden. Just don’t flush it.
What we liked
Charcoal flavor for less – The most affordable way to grill and smoke over real charcoal.
Ash catcher – The Premium’s high-capacity catcher makes the worst job on a kettle quick.
Smokes with a Slow ‘N Sear – Around 8 hours on a load, with a water reservoir built in.
Built to last – Durable with a little care, and there are tons of accessories.
What we didn’t like
Learning curve – Holding temps takes some practice.
Smoking needs an add-on – You’ll want the Slow ‘N Sear basket for longer cooks.
In our YouTube roundup of the best grill smoker combos, one trend came through in the comments. A 22-inch or 26-inch kettle with a Slow ‘N Sear, a rotisserie ring, and a fan controller is the truest do-it-all setup, and it costs less than most combos.
If you enjoy running a fire and mostly cook for a family, the kettle wins on flavor per dollar, and there’s very little that can break. Where it loses is convenience and capacity. Overnight brisket on a kettle means either a fan controller or a lot of checking, and you won’t fit three briskets on it.
Weber Original Kettle Premium 22 Charcoal Grill
A Weber Original Kettle Premium with a Slow 'N Sear basket is the cheapest way to grill and smoke over real charcoal, and it'll last for years. The ash catcher is worth the small step up from the base kettle, and nothing here beats it on flavor for the money.
CHECK LOWE'S PRICE
CHECK AMAZON PRICE
5. Best Kamado – Kamado Joe Classic II Ceramic Charcoal Grill
CHECK LOWE’S PRICE
CHECK AMAZON PRICE
The big pro of a kamado is how well it holds heat. Add a fan controller, and you can run a bigger one spot-on for around 20 hours. You can bake, grill, and smoke in it, so it covers just about everything you’d want to do in the backyard. It’s also far more efficient on charcoal than a gravity-fed unit.
When we tested the Kamado Joe Classic II, the divide-and-conquer grate system was the standout. You can sear on one level and cook indirect on another, and the ash drawer makes cleanup easy.
For smoking, you’ll want the half-moon heat deflector. The 18-inch Classic gives you about 406 square inches of cooking space, and it runs from around 225°F up past 700°F. It doubles as a pizza or bread oven, and the air-lift hinge takes most of the weight off the dome.
The 18-inch is the sweet spot for most people. Step up to the Big Joe if you regularly cook for a crowd. We prefer the Classic II over the Big Green Egg for the money (see our Kamado Joe vs Big Green Egg comparison). The newer Classic III upgrades the divide-and-conquer system and smoke circulation, but most cooks won’t notice the difference, and the II costs noticeably less.
Kamados are heavy, and the ceramic ones can break pretty easily, so plan on keeping it in one spot. Most take a while to get going because you have to get the charcoal lit and then bring the temp up slowly. Once you’re there, it holds for a long time. They can also be expensive, and there isn’t a lot of cooking space inside. Three or four briskets would be tricky.
What we liked
Holds heat – Steady temps for hours, and around 20 on a bigger one with a fan controller.
Divide and conquer – Sear on one level and cook indirect on another.
More than a grill – It smokes, and bakes pizza and bread too.
Easy on charcoal – Far more efficient than a gravity-fed unit.
What we didn’t like
Heavy and fragile – The ceramic can crack if it takes a knock.
Limited space – Three or
https://www.smokedbbqsource.com/best-grill-smoker-combos/
#smokercombos #best #grillsmoker #bestoverall #pelletgrill #charcoalgrill #webersearwood #combogrill #canyoncombo #inchcharcoal
#rss #feeds #linksharing #qwibbit
Weber Genesis Review: Hands-On Testing, Plus Which Model to Buy
Weber’s Genesis lineup has more model numbers than a parts catalog, and a lot of buyers fall into a trap trying to save a few bucks.
We’ve cooked on earlier Genesis grills, and after putting the latest E-330 Stealth through its paces, from a toast test on low to ribeyes over a 750° sear zone, we think it hits the sweet spot.
This review covers what I found in testing, what those model numbers actually mean, and how the E-330 stacks up against the rest of the Genesis family. Plus the big one: is it worth the money?
Weber Genesis E-330 Stealth 3-Burner Gas Grill
Pros:
Sear burner pushes the grates past 750°
Built to outlast a cheaper three-burner
Matte black finish skips the stainless polishing
Cons:
No interior or burner lighting
Factory stickers leave adhesive behind
Crafted accecssories can push your investment up
Check Latest Price
Lowe’s supplied this grill for free in return for my honest review. All thoughts and opinions are my own.
UPDATED OCT 28, 2026: Updated after testing the latest generation Genesis E-330
Weber Genesis overview and first impressions
The Genesis is Weber’s mid-range gas grill line. It’s a step up from the Spirit in build and features, but still priced for regular backyards, unlike the high-end Summit.
We tested the four-burner SPX-435 smart model when this generation launched in 2022, and went back and forth on which model to put through the wringer this time. We landed on the E-330 Stealth because it sits right where we think the lineup’s value is.
It’s a three-burner propane grill with a dedicated Sear Zone burner, the Weber Crafted frame kit, a side storage locker, and an all-black matte finish. It does miss out on the side burner and the Weber Connect app, but those aren’t huge losses.
It stands about 48 inches tall with the lid down and 63 inches with it up, and it’s about 58 inches wide. It should fit on most patios and decks.
Weber Genesis E-330 StealthBurners3 main + 1 Sear Zone burnerTotal BTUs52,000 (39,000 main + 13,000 sear)Cooking area641 sq in (513 main + 127.5 warming rack)GratesPorcelain-enameled cast iron, reversibleFlavorizer barsStainless steelDimensions48.1″ H x 57.7″ W x 27″ D (lid closed); 63″ H x 30.6″ D (lid open)Assembled weight168 lbFuelLiquid propane (natural gas sold as a separate model)IgnitionElectronic (battery powered)Warranty12-year limited
The first thing you notice is the look. The Stealth gets a matte black lid with black trim, side tables, handles, knobs, and wheels. It’s still kind of shiny, almost like smoked-out stainless, but with a matte finish that doesn’t need scrubbing every time you touch it.
I really love the Stealth look because it’s not stainless, and I don’t have to spend much time cleaning it. If you prefer the classic look, you can save around $50 and get the classic Weber look.
What I liked
Sear Zone burner – A separate 13,000 BTU burner with its own knob. It pushed the grates past 750° and gave my ribeyes one heck of a sear.
Build quality – The cast aluminum cookbox and sturdy cart feel like they’ll last years, not seasons.
Even heat – Toast came out pretty dang even, and my brats only needed one rotation.
Easy cleanup – The drip pan pulls out from the front, and the grease tray takes a disposable liner.
Stealth finish – Matte black looks great and doesn’t need constant wiping like stainless.
What I didn’t like
Stickers – The labels on the lid and side shelf peel off easily but leave residue you need to clean.
No Lighting – At this price point I would like to see some internal lighting or at least illuminated burners
Accessory creep – There are so many Crafted accessories you’ll want that the price creeps up if you buy them all.
Battery ignition – It works, but you need to keep spare batteries on hand.
Check Latest Price AT LOWE’S
Arrival and setup
I can’t tell you much about assembling this specific grill because I chose Lowe’s free assembly option, so they sent the grill to us pre-assembled. All I had to do was roll it into the studio, remove the stickers, and start cooking.
From experience assembling older Genesis and Spirit Weber grills, expect about 45 minutes to two hours of assembly time, depending on whether you choose a model with Weber Connect, which has more parts to assemble.
Every new grill needs a burn-off. That just means burning out any debris or oil left over from manufacturing.
Gas grills usually don’t have much machining oil, and with a Weber you don’t have to worry about leftover Styrofoam inside. I cranked it to max for about 30 minutes, turned it off, let it cool down, then fired it back up to cook.
Design and build quality of the Weber Genesis
This grill is built nice and sturdy. It’s not flimsy, it doesn’t wiggle, and you can’t feel the metal flexing when you lean on it.
The cookbox is cast aluminum, and that’s one huge bonus with a Weber. Your cooking chamber will last a long time.
Depending on how well you maintain it, you might need to replace a burner somewhere between 5 and 10 years in. But you won’t be chopping it up and hiding it in a garbage bag in your recycling bin because it’s junk. Even the control valves feel sturdier than those on many other brands.
The smaller details are well thought out:
Three tool hooks on each side shelf for your utensils
Hooks on the side to hang your grate while you’re using a Crafted accessory, so it isn’t leaning on the grill or lying on the ground
A side storage locker that holds the Crafted frame, plus a little spice cup
A storage cabinet underneath for accessories, grilling supplies, and your LP tank, with a hook so the tank hangs instead of flopping around on the cart floor
A lid thermometer that read close to my IR thermometer (more on that below)
If you’ve followed me for a while, you know I’m particular about casters. I like how these work. There are four casters that swivel, and the two in front lock. For the most part, they’re easy to lock in.
The electronic ignition is convenient, but you do need to keep spare batteries around.
Temperature performance
Before I put anything expensive on a new grill, I want to know where the hot and cool spots are. So my first test was a toast test.
I turned all the valves down to low, and the lid thermometer read about 350°. Then I laid bread across the grates to see how evenly it toasted across the whole cooking area.
For the most part, it was pretty dang even. Only one piece was a little lighter, toward the front edge.
Tip: Toast test any new gas grill on low before your first real cook. It takes a few minutes and tells you which parts of the grate run cooler, so you know where to rotate food.
I also checked the lid thermometer during the ribeye cook. With the Sear Zone at full blast, the lid read 750°, and my IR reader showed about 750 to 790° on the grate over the sear burner.
The far left burner wasn’t on max, so I think the chamber as a whole was running pretty true to 750°. The lid thermometer is close enough to trust.
My experience cooking on the Weber Genesis
With the grill already preheated from the toast test, I started with brats at medium, right around 500°. They cooked very evenly. I only had to rotate the front one to the back, and I didn’t have to shuffle them all over the grill. Those brats tasted awesome.
It’s a gas grill, so burgers were next. I flipped the reversible grates to the flat side for more contact with the meat. That gave me more sear and some beautiful-looking burgers. We’re a half cheeseburger, half hamburger family these days, so I did one of each. One heck of a bite.
Then it was time for the Sear Zone, and I didn’t mess around. I cranked it to full blast and put on ribeyes. I usually cook steaks around 500 to 600°, so I overcooked them a tad at 750°. They were still really good, and the sear was outstanding.
If you’re cooking steak on the Sear Zone at full blast, don’t do two minutes before the flip. Go about a minute and a half per side and you’ll get a good medium rare.
The last cook was barbecue chicken wings, because it’s football season. They took a little over 15 minutes and got the char we like, with marks on them but not burnt to a crisp.
I heated sauce on the warming rack, dipped the wings, then put them back on for a few minutes to caramelize. Crispy skin deliciousness. There’s always one wing that won’t come up to temp with the rest, so while I waited, I ate a couple more. Pitmaster privilege.
The Sear Zone is the real difference on this grill. You can leave that burner on full blast and run the rest of the grill lower, so you can sear a couple of steaks on one side while other food cooks gentler on the other.
Cleaning the grill
The drip pan pulls out from the front, so you don’t have to reach under the grill. Grab it, and it all slides out. After four cooks, mine definitely needed a cleaning.
The grease tray hangs underneath, and like most gas grills these days, you can buy aluminum liners to drop in it. Or you can be a cheapskate like me: put on some rubber gloves, clean it out, and reuse it.
The labels came off, but the adhesive stayed. We did that on purpose to see if the residue would bake into the lid over four cooks. It didn’t, and it still came off with a little cleaner.
I still recommend cleaning it off right away. If the grill lives outside, I’m not sure the residue won’t bake in eventually. Nobody wants a darker square on their lid that your mother-in-law points out every time she comes over.
Genesis models explained: which configuration to buy
The Genesis model names look confusing, but there’s a pattern that makes it easier to understand when you’re shopping.
First digit = main burners. The 330 has three main burners. A four-burner would be a 430.
Last two digits = feature level. 15 is the base model. 25 adds a sear zone, but it works differently (more below). 30 adds a dedicated Sear Zone burner with its own knob. 35 adds a side burner.
Letters = finish and tech. E means a porcelain-enameled lid, S means stainless, and X means Weber Connect Wi-Fi.
Special Edditions – You have the Stealth and Titanium editions which are mostly cosmetic
Weber does change things from year to year, so check the spec sheet before you buy.
Here’s the trap we mentioned up top. The base E-315 is the cheapest way into a Genesis, so it’s tempting, and a lot of people buy it for the brand name, only to be disappointed.
It costs more than the top-spec E-435 four-burner Spirit, which has its own sear zone, and beyond the Genesis build, you don’t get any bells or whistles for that money. There’s no dedicated sear burner, and while the grates still take Weber Crafted grillware, the Crafted frame kit that comes with the 330 isn’t in the box.
The Spirit now has a capable sear zone of its own, which narrows the gap with the Genesis.
If you’re going to spend Genesis money, we think the 330 is where it starts to make sense.
The difference between the 325 and 330 matters too. On the 25, the sear zone comes from double-rowed main burners, with no separate burner. If you turn them down to cook something else, you lose the sear heat. On the 30, the separate sear burner can stay on full blast while the rest of the grill runs lower.
An easy way to spot a true Sear Zone burner is its own separate knob.
For me, the 330 is the best value pick. I do a lot of braised brats, so a side burner is nice to have, but it’s not a must.
The E-330 includes the Weber Crafted frame kit. It lets you drop in accessories like a griddle, pizza stone, or even a wok if you want to do fried rice.
When we tested the SPX-435 back in 2022, we tried two Crafted accessories. The sear grate was the standout, leaving crisp crosshatch marks on steak, chicken, and even fish. The baking stone handled pizza fine, but it’s more of a nice-to-have, since an oven does the same job.
The Stealth also comes in a natural gas version that costs a little more. The propane model can’t be converted, so buy the fuel type you need.
If the all-black look isn’t a must, the standard black E-330 is the cheaper option.
How the Genesis compares
We’ve cooked on both of the grills Genesis shoppers ask us about most, so here’s where the E-330 Stealth lands against each one.
Weber Genesis vs Napoleon Prestige
When we put the Genesis head-to-head with the Napoleon Prestige, the Napoleon won on searing. Its infrared sear station runs around 1,200°F, far hotter than any Genesis sear zone. It also includes a rotisserie with its own rear infrared burner, knobs that light up when a burner is on, igniters that relight a burner if it blows out, and a lifetime warranty.
The Genesis won on storage, side shelf space and customization, and the E-330’s Crafted frame kit only widens that lead. The dedicated sear burner closes some of the searing gap too.
The Prestige is the better searing machine, but it costs a good deal more than the E-330. If you want infrared and a rotisserie and the budget stretches, go Napoleon. If you want a well-built grill that sears well and does everything else for less, the E-330 makes more sense. Read our full Napoleon vs Weber comparison for the details.
Napoleon Prestige 500 Propane Gas Grill
If you want infrared searing, a built-in rotisserie and a lifetime warranty, the Prestige is the step up from the Genesis.
CHECK LOWE'S PRICE
CHECK BBQ GUYS PRICE
Weber Genesis vs Monument Eminence 605
The Monument Eminence 605 is the opposite approach. You get six burners, 89,000 BTUs, 860 square inches of cooking space, an infrared side burner, a rear infrared rotisserie burner, LED knobs, a fuel gauge and a Wi-Fi controller.
On paper, it buries the E-330.
In person, the gap narrows. When I reviewed the Eminence, I found the Genesis had better fit and finish and thicker materials. The Monument is stainless rather than cast aluminum. It also needs power for the controller and lit knobs, and the stainless panels need regular wiping.
Think of the Monument as the fully loaded option list and the Genesis as the one you keep for 15 years. If you cook for big crowds and want every gadget, the Eminence gives you more grill for the money. If you’d rather have fewer features built to last, stick with the Genesis.
Monument Eminence 605 Gas Grill
Six burners, infrared searing and a rotisserie burner make the Eminence the most grill for the money, if you can trade some build quality for features.
Check Latest Price
Is the Weber Genesis worth it?
Weber has closed the gap with the Spirit, which now gets a seriously good sear zone of its own. But step up to the Genesis and the jump in build quality is noticeable. The cart body is sturdier, the casters roll and lock better, and the Crafted frame kit comes in the box, so you can add a griddle, pizza stone, or wok and really expand what this grill can cook.
My cons are small. Yes, the stickers are annoying, and the accessories add up. But this is a long-lasting gas grill that can feed a whole family, with a sear burner that runs as hot as you’ll ever need.
Many of you have had a Weber gas grill for 10 to 15 years, probably had a couple of kids along the way, and fed them all off it. In my opinion, you won’t go wrong with this investment.
Weber Genesis E-330 Stealth 3-Burner Gas Grill
Pros:
Sear burner pushes the grates past 750°
Built to outlast a cheaper three-burner
Matte black finish skips the stainless polishing
Cons:
No interior or burner lighting
Factory stickers leave adhesive behind
Crafted accecssories can push your investment up
Check Latest Price
https://www.smokedbbqsource.com/weber-genesis-review/
https://www.smokedbbqsource.com/wp-content/uploads/2026/10/weber-genesis-e330-stealth.avif
#webergenesis #whichmodel #searzone #plus #stealth #review #testing #burner #grill #webercrafted
#rss #feeds #linksharing #qwibbit
An Ode to Apples: Grilled, Stuffed, and Smoked
October is National Apple Month—not to mention, prime picking and eating time for some of America’s best apples. What better occasion to celebrate the contributions this storied fruit has made to American barbecue?
Apples possess a natural affinity for pork, which probably gained the fruit admission to the barbecue world in the first place. But don’t stop there. Apple juice, apple sauce, and cider vinegar are essential ingredients in regional American barbecue sauce. Apple wood is the fuel some of the most decorated competition pitmasters swear by. Then there are grilled apples, smoked apples, and “baked” apples hot from the smoker.
Given the apple’s deep roots in American food culture, you may be surprised to learn that the fruit originated in Central Asia. The early colonists brought the apple to the New World along with the honeybees needed to pollinate the trees. Thousands of apple varieties have been grown in the U.S., though only a fraction are grown commercially.
So how else should you use apples and apple-based products to take your barbecue to the next level?
Apple Brines and Marinades
Make an apple brine: Replace a portion of the water in a standard brine recipe with apple cider or apple juice for pork, turkey, and game birds.
Make a simple apple marinade or injector sauce: Combine 2 cups of apple cider with 1/4 cup each apple cider vinegar, soy sauce, maple syrup, and vegetable oil. Add 2 tablespoons Worcestershire sauce.
Don’t forget hard cider, made by fermenting apple cider like beer. A dry hard cider is less sweet than apple cider, which makes it ideal for basting or as a base for marinade.
Apple Sprays, Basting Mixtures, and Mop Sauces
Place apple cider in a spray bottle and spray it on ribs or pork shoulder as they smoke to add another layer of flavor.
Combine apple cider, cider vinegar, bourbon, Worcestershire sauce, lemon juice, and a little water to make a “Cider Squirt” for basting pork and poultry. Squirt it from a spray bottle or brush it on with a basting brush.
Make a hog slather by combining mustard, apple cider, Worcestershire sauce, and melted butter in roughly equal proportions. Brush on the meat with a basting brush.
For a simple mop sauce for beef brisket, combine one bottle of beer with 1/2 cup apple cider vinegar, 1/2 cup cold-brewed coffee, and 2 tablespoons Worcestershire sauce. Swab it on with a barbecue mop at the 1-hour mark, and every hour after that.
Apple Cider or Apple Juice?
So what’s the difference between apple cider and apple juice? In the U.S., sweet cider is generally unfiltered, while apple juice is filtered for clarity. Either may be pasteurized. I prefer cider—especially freshly pressed at a farm stand. The aroma and flavor will vary depending on the season and which apples are used.
Three Apple Recipes for the Grill
Put the fruit itself on the menu with these recipes for a grilled side dish, savory stuffed apples, and a skillet dessert.
Apple “Steaks”
Thick slices of Granny Smith apples get a glaze of cider, honey, lemon juice, and butter before and during grilling. Direct high heat browns the slices while leaving them firm enough to hold their shape. Serve them alongside grilled pork chops.
Get the Apple “Steaks” Recipe »
Apples Stuffed with Sausage and Sage
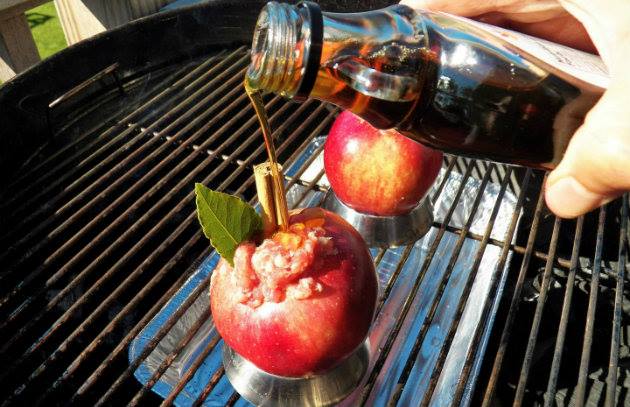
Pork sausage, onion, celery, and sage fill these apples, with a little maple syrup spooned over the stuffing. Smoke-roast them over indirect heat until the apples soften. They’re a savory side dish you can assemble several hours ahead and refrigerate until grilling time.
Get the Sausage-and-Sage Stuffed Apples Recipe »
Smoke-Roasted Apple Crisp
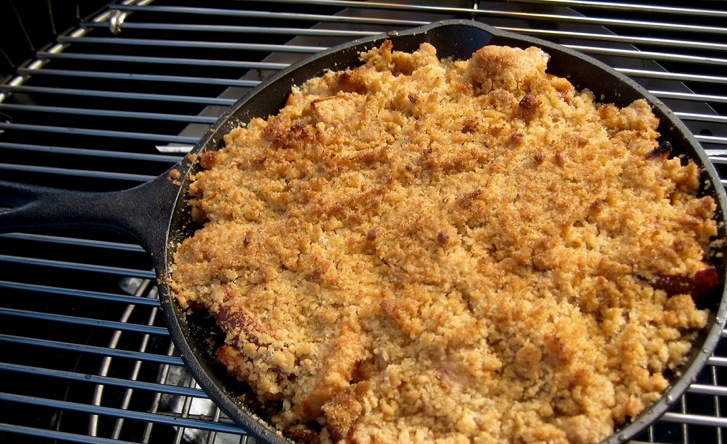
Apples, lemon, and cinnamon go into a cast-iron skillet beneath a topping of butter, granola, flour, and brown sugar. Smoke-roast over indirect heat until the filling bubbles and the topping browns. Let it cool for a few minutes before serving—with ice cream, if you like.
Get the Smoke-Roasted Apple Crisp Recipe »
Next time you’re picking up apples, grab a few extra for the grill. Serve them alongside pork, stuff them with sausage, or save them for dessert. And if there’s cider in the fridge, you’ve got the start of a baste for whatever’s smoking.
Plan your next cook with our full recipe collection—weeknight grills, weekend projects, and special-occasion feasts.
Get Steven’s weekly grilling tips, seasonal recipes, and live-fire ideas in your inbox. Join our Up in Smoke newsletter. Sign up and get a FREE PDF of Steven Raichlen's Best Ribs Recipes Ebook.
Preorder Man On Fire — A Steven Raichlen Memoir. And get some really cool rewards!
Looking to upgrade your tailgating setup? Check out our Tailgating Essentials.
The post An Ode to Apples: Grilled, Stuffed, and Smoked appeared first on Barbecuebible.com.
https://barbecuebible.com/2026/10/27/grilled-stuffed-smoked-apples/
#apple #cider #stuffed #smoked #ode #juice #grilled #basting #nationalapple #make
#rss #feeds #linksharing #qwibbit
#apple
#cider
#stuffed
#smoked
#ode
BBQNotes3d
Yoder YS640s Review: Is It Worth the Price? (Standard vs Competition Cart)
The YS640s has been our pick for the best high-end pellet grill for a while now. Our team first got hands-on with the standard cart version. This year, All Things Barbecue sent me the YS640s on the competition cart to test out.
I put it through overnight brisket, beef ribs, chicken, burgers, and dogs. I also ran temperature and toast tests to see where the heat really goes. So this review isn’t a first impression. It’s what we’ve learned from two different setups of the same pit, and which one I’d actually spend my money on.
Here’s the good, the bad, and how to pick the right cart. If you’d rather watch, I filmed the whole thing, from the unboxing and burn-in through the toast test and the overnight brisket.
BEST VALUE
BEST UPGRADE
Yoder YS640s Standard Cart
Yoder YS640s Competition Cart
Pros:
Same 10 gauge chamber, controller and cooking space
Lighter at about 335 lb
Pros:
Heavy 10 gauge cart with tie-downs
8" pneumatic tires and locking casters
Cons:
Small casters struggle on gravel and decks
Basic cart with fewer extras
Cons:
Expensive, especially with the drawer
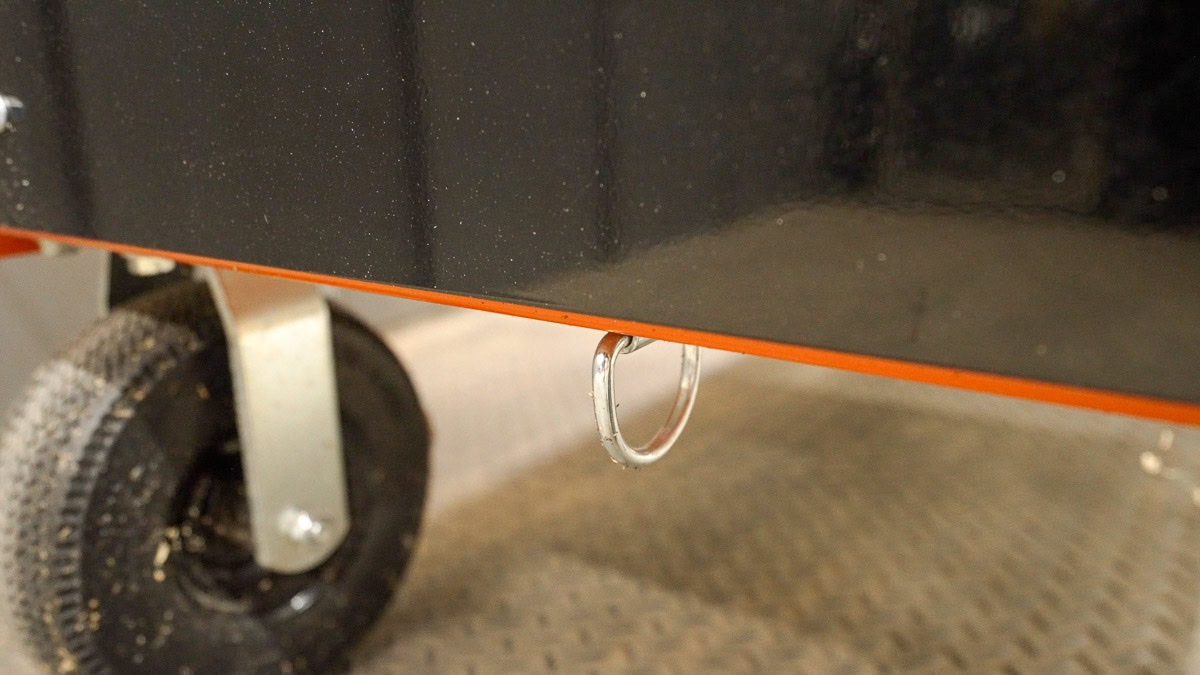
Heavy to steer at 418 to 505 lb
Check Latest Price
Check Latest Price
BEST VALUE
Yoder YS640s Standard Cart
Pros:
Same 10 gauge chamber, controller and cooking space
Lighter at about 335 lb
Cons:
Small casters struggle on gravel and decks
Basic cart with fewer extras
Check Latest Price
BEST UPGRADE
Yoder YS640s Competition Cart
Pros:
Heavy 10 gauge cart with tie-downs
8" pneumatic tires and locking casters
Cons:
Expensive, especially with the drawer
Heavy to steer at 418 to 505 lb
Check Latest Price
UPDATED OCT 27, 2026: New hands-on testing of the competition cart, plus a standard vs. competition cart comparison.
Yoder sent me this smoker for free in return for my honest review. All thoughts and opinions are my own.
Overview & first impressions
Yoder has built its name on the competition circuit with heavy-duty smokers made in Kansas. But what does that kind of pit actually do better than a box store pellet grill you can pick up for less than half the price?
We’ve been cooking on the standard cart version for years, and I’ve spent the last few weeks putting the competition cart through its paces. The cooking chamber and controller are the same on both, so they smoke the same. But there are some key differences in the cart and day-to-day use, and I’ll get into those further down.
The YS640s is the bigger brother to the YS480s, and for most backyard cooks it’s the one I’d point you to. You get enough room for a couple of briskets or a full spread of burgers for a crowd. The bigger decision is which cart you put it on. That changes the price by up to $1,300, and I’ll walk you through all three setups below.
Yoder YS640s Specompetioncs:
Standard CartCompetition CartCooking space1,070 sq in (640 main grate + 430 upper rack)1,070 sq in (640 main grate + 430 upper rack)Cooking chamber10 gauge steel10 gauge steelCart steel14 gauge10 gaugeHopper20 lb20 lbControllerYoder ACS, Wi-Fi, FireBoard appYoder ACS, Wi-Fi, FireBoard appWeight~335 lb418 lbWheels8″ hard rubber + small casters8″ pneumatic + locking casters (10″ optional)Tie-downsNoYesWarranty10 yr body, 3 yr controller and igniter10 yr body, 3 yr controller and igniterPriceCheck Latest PriceCheck Latest Price
Getting the YS640s off the pallet tells you a lot about it. This thing is heavy, and you feel it the second you try to push it. Lift the lid, and there’s real weight there too, enough that Yoder added a counterweight to help you out. Rap your knuckles on the cooking chamber, and it gives off a satisfying thud.
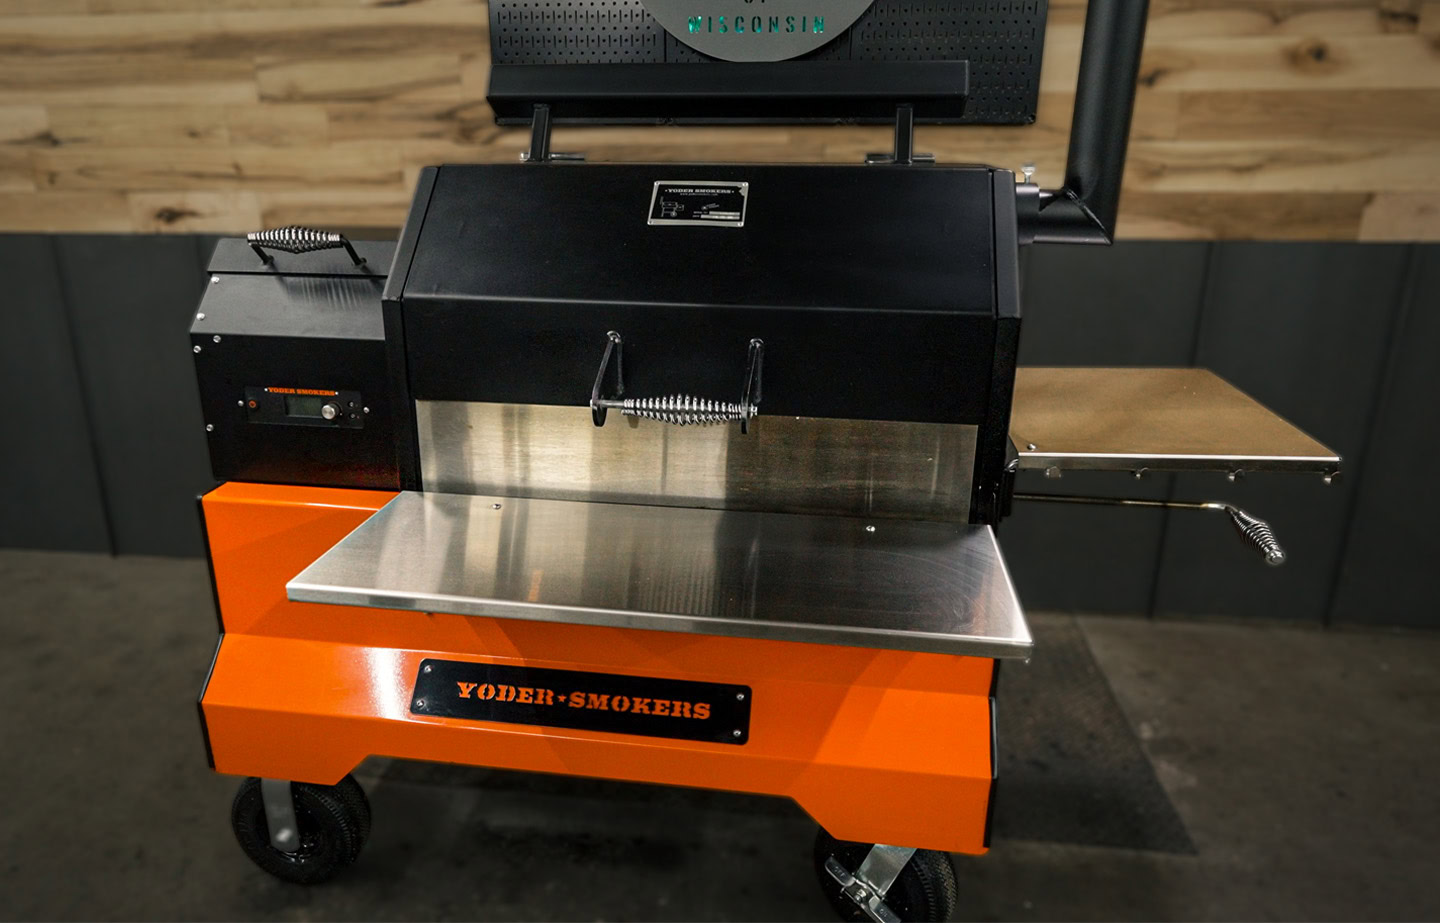
Yoder also offers a long list of add-ons: grate options, shelves, a lid thermometer, and more. Mine came with stainless front and side shelves and a stainless drip tray, on the competition cart with the storage drawer. I’ll cover which extras are worth it as we go.
What I liked
Real smoke flavor – noticeably smokier than most pellet grills I’ve run, especially on the brisket and ribs
Built like a tank in the USA – 10-gauge steel cooking chamber, made in Kansas
FireBoard app – I monitored an overnight brisket from bed without a single problem
Grills as well as it smokes – pull the diffuser door for direct-flame searing
What I didn’t like
Removable chimney drips grease – tip it down for storage and grease runs onto the shelf. Shove a cup on the end, and that solves it though.
Heavy and hard to steer – 418 to 505 lb with no pull handle
No pellet dump door – emptying the hopper means burning it down or scooping it out
Yoder sells direct through its sister retailer, All Things Barbecue, which is where you’ll find every configuration and accessory mentioned in this review.
CHECK LATEST PRICES AND OPTIONS AT ATBBQ.COM
Arrival and setup
The YS640s shows up on a semi with a liftgate, strapped to a pallet. When mine arrived, the driver asked if I wanted it turned around so it faced the open side of my studio. I said no. Big mistake. I didn’t have much room in that direction, and I ended up wrestling the wheels to get it off the pallet later. If you’re unloading in your driveway, you’ll be fine. If space is tight, let the driver turn it.
It comes in a big cardboard box, but that box is just a protective wrap. Pull it off and you’ll find the best part: the grill arrives fully assembled. No afternoon with an Allen key and a bag of bolts like most box store pellet grills.
The pit is screwed down to the pallet with wooden blocks. I used a drill and a good wrecking bar to get them off. I couldn’t get every screw out with the drill, so the wrecking bar finished the job. A reciprocating saw would work too. Just take your time so you don’t scratch anything.
Before you roll it off, open the lid and take everything out of the cooking chamber. Then build yourself a little ramp out of a couple of 2x4s. Grab a second set of hands for this part if you can. My comp cart setup is pushing 505 lb, and you don’t want it dropping straight off the pallet onto the ground.
Once it’s on the ground, all that’s left is putting on the chimney, dropping the cooking components into the chamber, and adding your shelves.
The burn-in
Every new grill needs a burn-off. But on a pit painted with high-temp paint like this one, I like to cure the paint low and slow.
Yoder’s manual says to run it at 350°F for about an hour. I’m a little more cautious. My dad was an auto body painter, and he always talked about curing things slowly. So I start any high-temp painted pit at 225°F and run it there for at least an hour once it hits temp. Then I crank it to 350°F for at least another hour.
Once it’s at 350°F, I spray down the inside of the cooking chamber with oil. I skip the inside of the lid, though. I’ve had oil run down the face of a grill before, so now I let the lid season naturally over the next few weeks of cooks.
When you’re done, hit the power button and let it run through its shutdown cycle. Once it’s completely cool, you’re ready to cook.
Design and build quality
The first thing you notice about the YS640s is the weight of it. The cooking chamber is 10 gauge steel, which is roughly twice as thick as what you’ll find on most box store pellet grills. (With steel gauge, a lower number means thicker metal.) Even the upper cooking rack is seriously heavy. Pull it out for cleaning and you’ll feel it.
That heft shows up everywhere. The lid is heavy enough that Yoder added a counterweight to help you lift it, and it opens smoothly every time. The handles stay cool to the touch, which I appreciated when I was running it at 600°F and didn’t have to hunt for a glove. And there’s a felt gasket around the lid, so you don’t get much smoke leaking out the sides. It all comes out of the stack where it belongs.
Yoder clearly thought about the practical details too. My favorite design touch is the damper handle.
Push it all the way in and it closes off the space under the drip pan, concentrating the heat on the fire pot side. That’s perfect when you’re only grilling a couple of steaks. Pull it all the way out, and the heat spreads across the whole chamber for a full load.
One small thing I like is that the power cord detaches from the grill, so you’re not running it over every time you roll the pit into place.
Temperature performance
I’ll get to the brisket, I promise. But before I put a $100 packer on any new pit, I want to know where the hot and cold spots are. It’s a lot cheaper to find them with a few slices of bread.
The first thing I noticed during preheat is that the YS640s likes to overshoot your set temp a little. It isn’t just heating the air blowing through the chamber. It’s trying to bring all that heavy steel up to temperature, so it runs a bit hot before it settles. Give it time, and it comes back down to where you want it.
To see how evenly it cooks, I ran a left-to-right temperature test with my own FireBoard 2 Drive, not the grill’s built-in probes, with probes on the left and right sides.
At the start of every cook, there was a 25 to 30°F difference from one side to the other. Once the pit stabilized, that closed to about 10°F, which is pretty dang good for a pellet grill this size.
I’d seen people online talk about hot spots, so I also ran a toast test, laying bread across the whole grate to see where it browned. The toast right above the fire pot came out darkest, no surprise there.
Toast test: hottest over the fire pot and on the right side, but even enough across the grate to cook on with confidence.
On the right side, the front and back rows were a little darker than the middle, which makes sense, since that’s where the heat travels around the drip pan and out the exhaust. On the left, the center pieces over the fire pot browned more than the outer rows.
Overall, the right side runs a little hotter than the left. But looking at the whole grate, everything was within reason except the very outer edge. I’m used to hot spots on my offset and plenty of other pellet grills, and these are easy to work with. Put the thicker cuts or the meat you want done first on the right, and anything delicate on the left.
Smoking on the YS640s
I keep going back to the smoke, because that’s one thing I wrote down on every single test cook.
Even my very first cook, which was really just about getting the Wi-Fi set up and seeing how the YS640s performs, had it bellowing smoke out of that stack.
For the big test, there was no way I wasn’t doing an overnight brisket. It’s a fun little test to see how a grill performs. Thanks to the app, I could monitor it the whole time, and I’ll be honest, I only checked on that brisket four times from start to finish.
I put it on the grill, then came back hours later to add a rack of beef back ribs and give the brisket a spritz.
At about 180°F internal, I wrapped it in butcher paper, and when my probe read around 205°F, I came out to check. It was done.
The bonus was that the ribs were done too, so both got wrapped up and went into the cooler for a 2-hour nap.
Both the brisket and the ribs were tender and juicy. But the big thing I noticed was that smoky flavor. It just seemed to have a tad more than some of the other pellet grills I’ve been running lately.
If you’re looking at the standard cart, none of this changes. It’s the same 10-gauge chamber and the same controller, so you’ll get the same results. The cart only changes how you live with the pit, not how it cooks.
The standard cart version with a full load. The chamber and controller are the same as the comp cart, so it cooks the same.
Grilling on the YS640s
With birthdays and everything going on, I actually grilled on this pit more than I smoked on it, and there aren’t many pellet grills I can say that about.
I kept it easy and set it at 350°F, which is the startup temp when you first fire it up anyway.
Grilled chicken thighs were a perfect chance to see how evenly the whole pit cooks, and for the most part everything was done at about the same time. A couple needed a little longer, but they were thicker. They got some nice crispy, charred color and tasted nice and smoky.
BBQ chicken breasts at 350°F were easy. I got some nice grill marks, then dipped them in our favorite sauce to give them a caramelized finish.
And if you’re having a party with a bunch of family coming over, this pit has no problem grilling up hot dogs and hamburgers. You even get some really nice color, a little bit of smoky red with some char marks.
12 burgers, plus more than two dozen hot dogs and brats, all on the 640 sq in main grate, with the upper shelf still free if you need more room.
If you’re only cooking a few steaks, push the damper in to concentrate the heat over the fire pot. For true direct-flame searing, lift out the diffuser access door and cook right over the fire.
For even more heat, Yoder recommends adding GrillGrates for the YS640s, which push the max temp past 650°F.
The controller and app
Yoder runs its own ACS controller, but it partners with FireBoard for the app and temperature monitoring, and I’ve run enough FireBoard gear to say it’s one of the better setups on the market.
That’s what made the overnight brisket so easy. I watched the pit and meat temps from bed, and I only went outside when something actually needed doing. Two food probes come in the box. They plug in through a port inside the chamber, so you’re not running wires under the lid.
The screen itself looks a little dated compared to what you find on the latest Traegers, but you still get plenty of functionality, including a graph of pit and meat temps over the whole cook, which is handy for figuring out what happened when the stall hit.
The real advantage of this system is the programs you can set up. For example, bumping the temp up at a certain time or once the meat hits a target. And because it all runs over Wi-Fi, you can check on your brisket from the grocery store while you’re grabbing whatever you forgot.
The temperature range is one of Yoder’s underrated strengths. It runs from 150 to 600°F, and both ends of that range are useful. At the bottom, 150°F is lower than a lot of pellet grills can hold. Many bottom out around 180°F, and that gap matters when you’re making jerky, smoking sausage or fish, or keeping food warm without cooking it further. At the top, 600°F gets you into real searing territory for steaks, and it’s hot enough for pizza with Yoder’s wood-fired oven insert.
It lights with a ceramic igniter, and those last a lot longer than the old hot rod igniters. Yoder backs both the controller and the igniter with a 3-year warranty.
Cleaning the YS640S
Cleaning the YS640s is pretty much the same as any other pellet grill. The one difference is that everything is heavier, especially that upper interlocking rack. That’s some seriously heavy metal, so take your time pulling it out.
For the drip pan, I’d grab a metal scraper to get all the gunk off. A plastic one will work, but on a pan this heavy I’ll always use metal. You’re not trying to sharpen anything, just get it clean.
The big surprise came when I pulled the drip pan out. There wasn’t a bunch of grease in the bottom of the chamber. After five or six cooks on some pits, the grease mixes in with the ash and you have to scrape it all out. Here, I could just vacuum it straight out.
The grease that does drain off ends up in a hanging bucket. I’m usually not a big fan of that design. I’d rather have a discreet grease catch built into the grill. But Yoder was smart about it and tucked the bucket into its own cubby, out of the way, where it hooks on and can swing when you move the pit.
It’s not sitting out in the open waiting for someone to knock it over.
YS640s configurations and options
Every YS640s has the same cooking chamber, the same ACS controller and the same smoke performance. What you’re choosing is the cart, and the extras you build around it.
The standard cart: best value
The standard cart is where I’d start most people. You get the exact same grill I’ve been cooking on for the lowest price. That makes it the best value in the lineup, and it’s the most popular configuration for a reason.
From there, there are a few add-ons worth knowing about:
Ultimate Grilling Bundle – mostly consumables like p
https://www.smokedbbqsource.com/yoder-ys640s-review/
#competitioncart #standardcart #latestprice #checklatest #yoder #best #pros #cons #heavy #upgradeyoder
#rss #feeds #linksharing #qwibbit
Back to Basics: Crispy Pulled Pork Bacon Sliders
Photo Credit: Daniel Hale
By Daniel Hale
Presented by Wildfire Outdoor Living
Pulled pork is one of those foods that may be even better the second time around.
For this installment of Back to Basics, we’re turning leftover pulled pork into a quick griddle meal that works just as well at home as it does at a tailgate.
Of course, here at BarbecueBible, we’re happy to smoke a pork shoulder from scratch. But if you already have pulled pork in the refrigerator—or pick some up from your favorite barbecue joint—you’re most of the way there.
For this recipe, I used the Wildfire Ranch Pro 30″ Griddle to turn the pork into crispy little slider patties. Think of them as pulled pork burgers, with bacon doing double duty as both topping and flavor.
Start With the Bacon
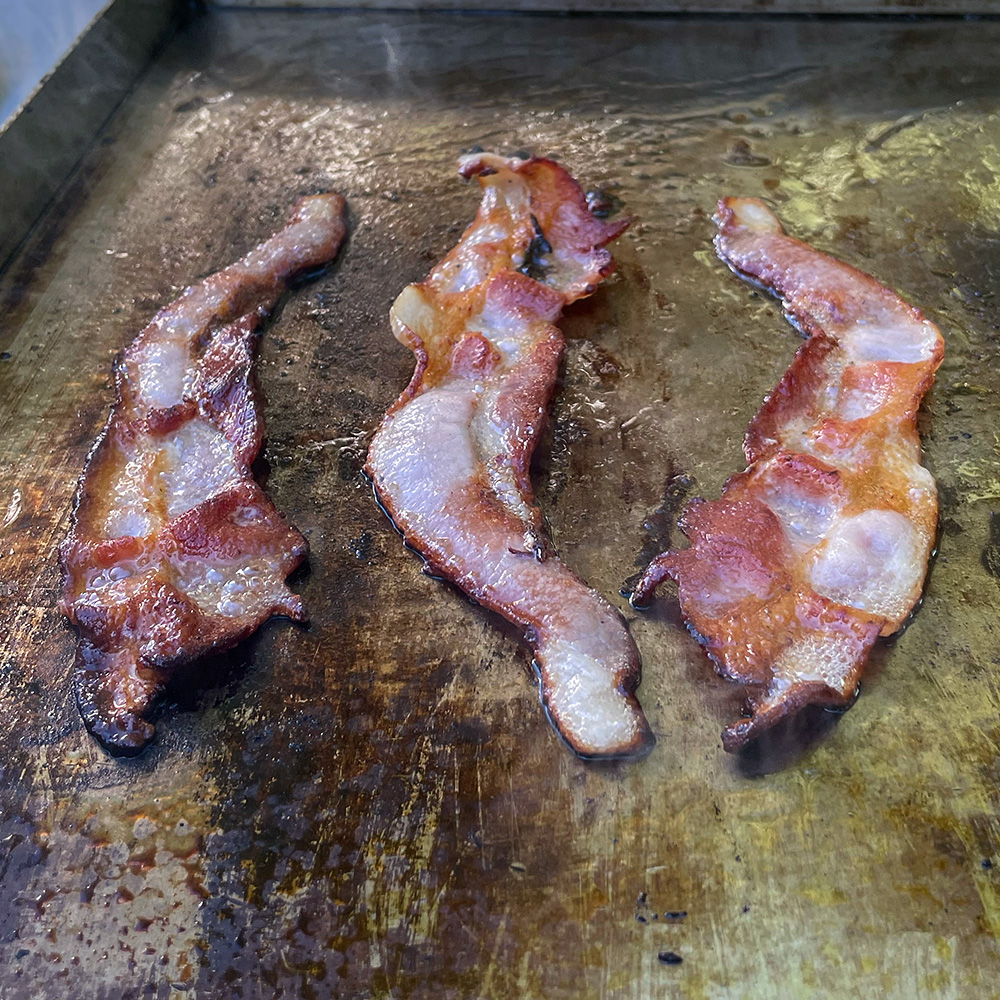
I started by cooking strips of bacon directly on the Wildfire griddle.
Once the bacon was crisp, I removed it from the griddle and set it aside for the sliders. More importantly, I left the rendered bacon fat right where it was.
That fat becomes the base for crisping the pulled pork.
Photo Credit: Daniel Hale
You could certainly use butter or olive oil instead, but if bacon is going on the finished slider anyway, why not? Also: it’s bacon.
Turn Pulled Pork Into Crispy Patties
Instead of simply piling the pulled pork onto the griddle, I formed it into small patties about the size of the slider buns.
The patties don’t need to be packed tightly like hamburgers. Press them together just enough to hold their shape.
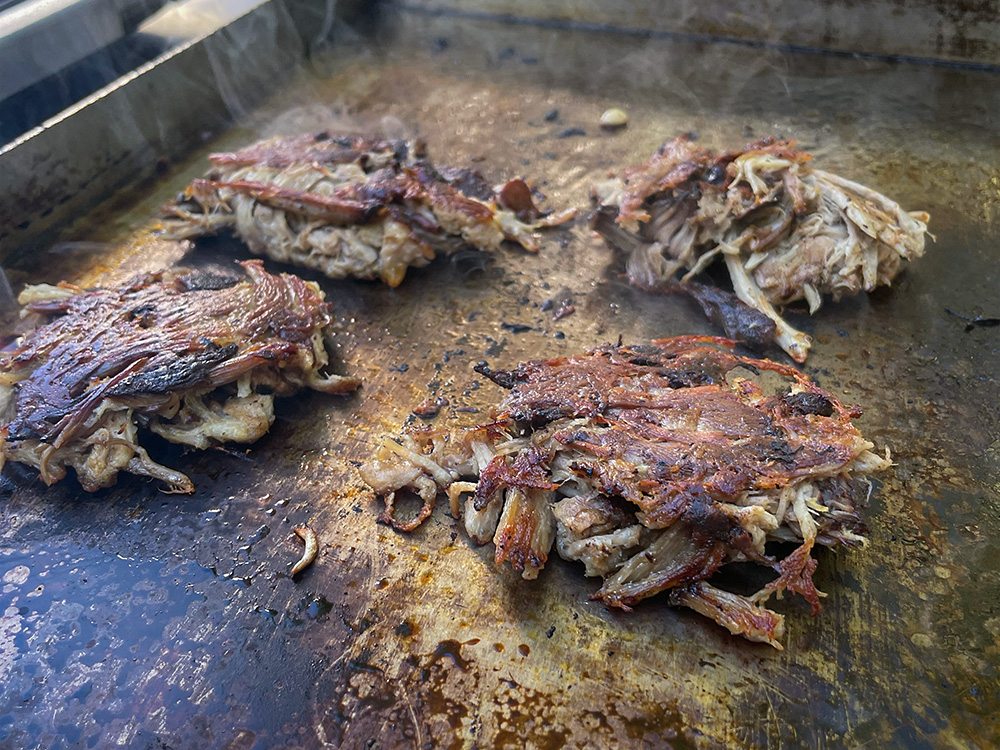
Place them directly in the hot bacon fat and let them cook without moving them around too much. You want the pork making solid contact with the griddle so the bottom develops a crisp, browned crust.
Photo Credit: Daniel Hale
Flip the patties and crisp the second side.
The result is still tender pulled pork in the center, but with deeply browned edges and a crunchy exterior.
That contrast is what makes these different from simply reheating leftover barbecue.
Keep the Sliders Simple
Once the pork patties are crisp, the rest comes together quickly.
Chop the cooked bacon and pile it onto the pork. Add your favorite barbecue sauce if you like, then sandwich everything between slider buns.
Coleslaw makes a good topping, particularly if you want something cool and crunchy against the hot pork. Pickles would work, too.
But you don’t need much. The crispy pork and bacon should stay at the center of the slider.
Photo Credit: Daniel Hale
A big thank you to Wildfire Outdoor Living for sponsoring this post.
Wildfire Outdoor Living is an Arizona-based company specializing in high-performance gas grills and premium outdoor kitchen solutions. Wildfire brings a commitment to cutting-edge technology and industry-leading innovation. Their 304 stainless steel design and illuminated LED knobs, cast stainless steel burners, and laser-cut stainless steel cooking grates create products that will provide peak performance. They also allow you to customize your outdoor kitchen with designer finish knobs and handles to meet the growing demand for designer outdoor kitchens.
Want to go deeper on the craft? Explore our grilling techniques and how-to guides for ribs, steak, chicken, seafood, and more.
Get Steven’s weekly grilling tips, seasonal recipes, and live-fire ideas in your inbox. Join our Up in Smoke newsletter. Sign up and get a FREE PDF of Steven Raichlen's Best Ribs Recipes Ebook.
Preorder Man On Fire — A Steven Raichlen Memoir. And get some really cool rewards!
Looking to upgrade your tailgating setup? Check out our Tailgating Essentials.
The post Back to Basics: Crispy Pulled Pork Bacon Sliders appeared first on Barbecuebible.com.
https://barbecuebible.com/2026/10/23/crispy-pulled-pork-bacon-sliders/
#pulledpork #bacon #basics #wildfireoutdoor #outdoorliving #griddle #back #patties #wildfireranch #crispypatties
#rss #feeds #linksharing #qwibbit
Big Beef Flavor, Little Buns: Smoked Chuck Roast Sliders
By Daniel Hale
Tailgating calls for food that’s easy to serve, easy to eat, and substantial enough to satisfy hungry sports fans. Here at BarbecueBible.com, we believe you can do better than the usual burgers and hotdogs. BBQ beef sliders check all three boxes, especially when the beef has been smoked low and slow over smoldering hardwood. Just one catch: You’ll want to smoke the beef the day before the game. Which, come to think of it, isn’t a catch at all, because by doing most of the prep ahead of time, you get to enjoy the game.
For this recipe, I went with chuck roast instead of brisket. It’s a smaller, more manageable cut of beef with plenty of marbling and rich flavor. It’s a lot more affordable (and these days, who isn’t worried about the grocery bill.). And when smoked properly, it makes a spectacular filling for BBQ sandwiches.
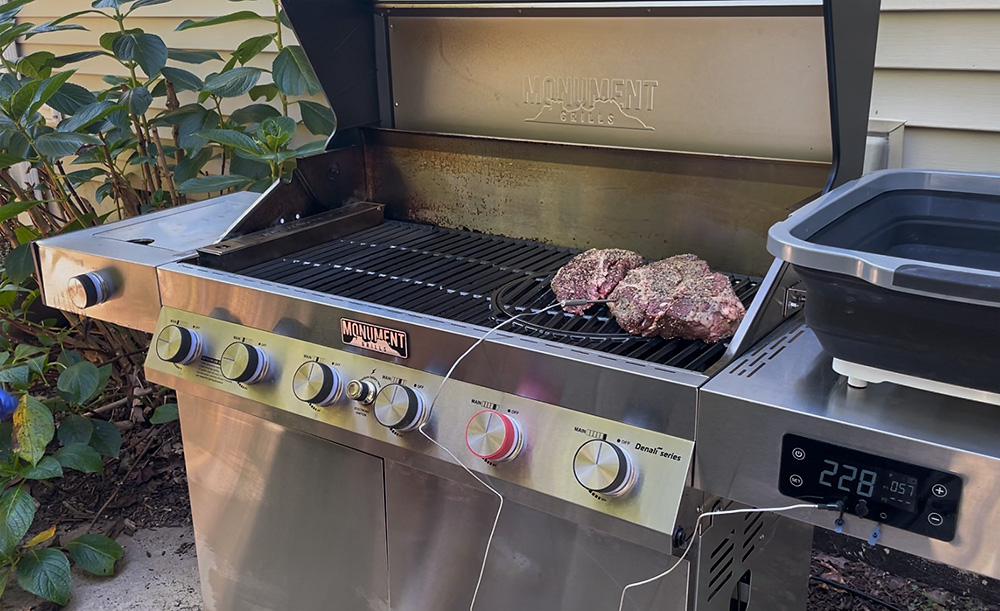
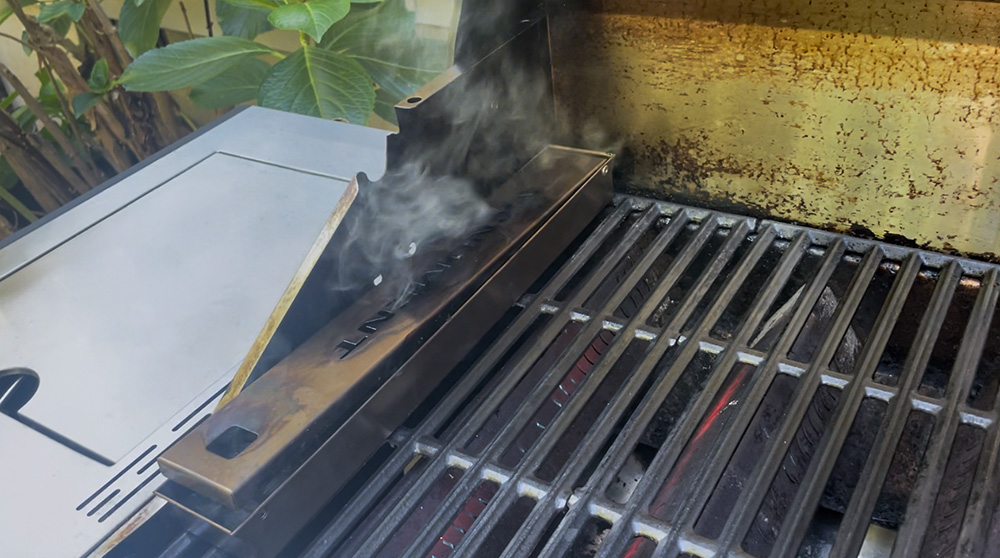
I used the Monument Denali 605 gas grill and Monument smoker box to smoke the chuck roast low and slow, developing a flavorful, smoky bark before chopping the beef for our sliders.
And yes, you can smoke beef on a gas grill. You just need the right setup, some wood chips, and patience.
Why Chuck Roast Works for BBQ Sliders
Chuck roast comes from the shoulder of the steer, an area that gets plenty of exercise. The meat contains loads of connective tissue and intramuscular fat, which make it particularly well-suited to low-and-slow smoking.
As the roast heats, the connective tissue gradually breaks down, helping transform a tough cut of beef into meat tender enough to cut with the side of a fork.
Chuck also has a practical advantage over brisket. You can purchase a roast weighing three to five pounds rather than committing to a 12 pound packer. For this smoke, I started with a boneless chuck roast weighing a little over 4 1/2 pounds.
If you have the time and patience, you can smoke a chuck roast until it’s tender enough to pull or shred with forks. I had neither, so I chopped the smoked chuck with a cleaver instead. It makes an excellent sandwich filling, especially when mixed with barbecue sauce.
How to Set Up the Monument Denali 605 for Smoking
A gas grill might not be the first thing that comes to mind when you think about smoking beef, but with indirect heat and a smoker box, it’s entirely possible.
I used the Monument Denali 605 gas grill, setting it up for indirect grilling with a target temperature of approximately 250°F.
The Monument smoker box holds wood chips, allowing them to smolder over an active burner and produce smoke inside the grill. The chuck roast sits away from the direct heat, where it can smoke slowly without scorching.
My target was 250°F, although the grill temperature fluctuated between approximately 230°F and 280°F throughout the smoke. Maintaining a steady low temperature can be tricky on a gas grill, even with the burners turned down.
Steven shared a little hack for managing the heat: Prop the grill lid open slightly with a small metal rod to allow some heat to escape. (I wish I’d known that one before I started!)
I added wood chips twice during the initial smoking stage. The goal was to develop a noticeable smoke flavor and a dark exterior bark, not to produce heavy smoke for the entire grilling session.
A few tips for smoking on a gas grill:
Use indirect heat so the roast isn’t sitting directly over an active burner.
Monitor the grill temperature and adjust the burners as necessary.
Replenish wood chips when needed, especially during the early stages of smoking.
Use a meat thermometer to follow the roast’s progress.
Smoking the Chuck Roast
I started by seasoning the chuck roast generously with Steven’s Texas Brisket Rub, covering all sides of the meat.
Once the Denali was preheated and the smoker box was producing smoke, I placed the roast over indirect heat and closed the lid.
After four hours, the internal temperature was approximately 142°F. An hour later, it had only climbed to 147°F.
That slow progression isn’t unusual with a large piece of beef. Evaporative cooling can slow the rise in internal temperature, a phenomenon barbecue enthusiasts know as the stall. And personally, it drove me crazy.
By this point, the chuck roast had spent around five hours in the smoke, developing its bark and smoke flavor.
Rather than continuing to smoke the beef uncovered, I moved to the next stage: a covered finish to help tenderize the meat.
Finishing the Chuck Roast
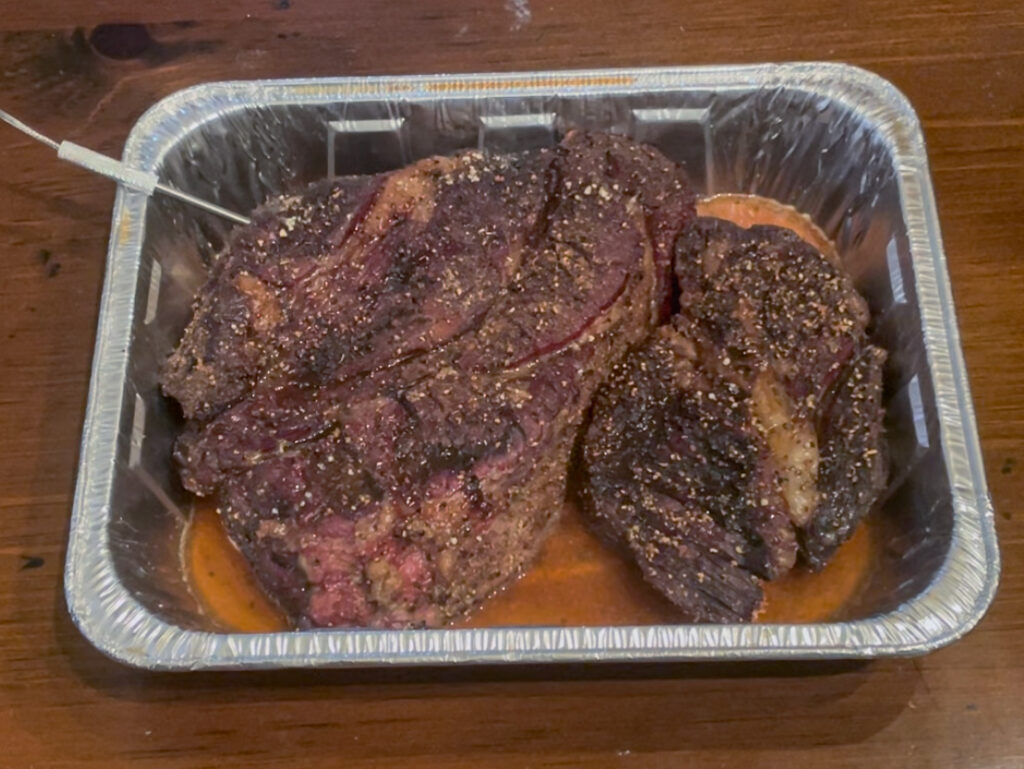
Once the smoking stage was complete, I transferred the roast to a foil pan with beef broth, Worcestershire sauce, minced garlic, and onion powder.
I covered the pan tightly to retain moisture and moved it to the oven to finish. That’s a little tip I picked up from barbecuebible.com editor Nancy Loseke: Once the grill has done its job developing the smoke flavor and bark, there’s no need to keep burning propane—unless you want to. Your oven can take it from there.
The purpose of this stage is to help break down the connective tissue while keeping the meat moist. The liquid also collects beef juices that can be used later when preparing the sliders.
After more than eight hours of total grilling and finishing time, the chuck roast reached approximately 205°F internally.
Here’s something worth emphasizing: Internal temperature alone doesn’t guarantee tender beef.
Although the roast had reached the temperature normally associated with shreddable chuck, it wasn’t quite as tender as I had hoped. One section pulled apart relatively easily, while the larger portion still offered a little resistance.
Since it was getting late, it was time for Plan B. I decided to chop the meat instead.
And that proved excellent for sliders.
If you’re aiming for fully shredded beef, you have to keep cooking until a temperature probe or skewer slides into the thickest part with very little resistance. That final tenderness test is more important than reaching a particular temperature on the thermometer.
Building the Smoked Chuck Roast BBQ Sliders
With the beef rested and chopped, it was time to assemble the sliders.
I mixed some of the chopped smoked chuck roast with barbecue sauce, using just enough to coat the beef without overpowering the smoke flavor. You can use any barbecue sauce you like, including Steven’s Chipotle Molasses Barbecue Sauce. Personally, I prefer a sauce with less sugar for health reasons. I’m partial to Stubb’s Simply Sweet Reduced Sugar BBQ Sauce.
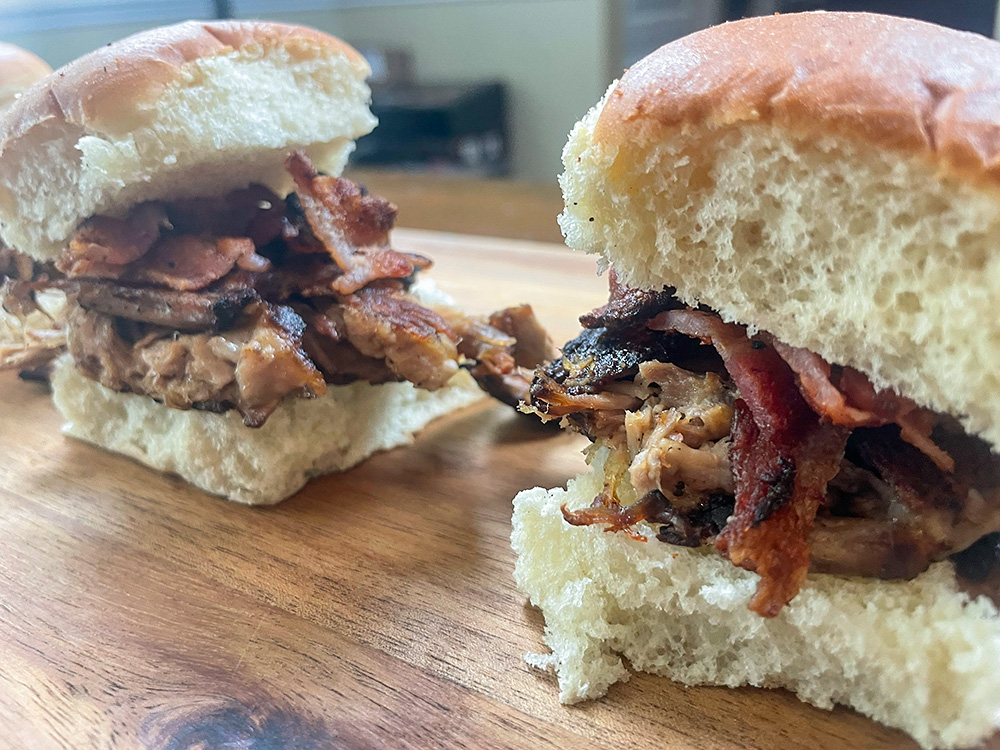
For the sandwiches, I kept it simple: Hawaiian slider rolls, smoked BBQ beef, and provolone cheese. The sweetness of the rolls worked nicely with the smoky beef and barbecue sauce.
These sliders are ideal for tailgating because you can prepare the beef the day before the game. Save some of the juices from the covered finishing stage to keep the meat moist when reheating.
On game day, simply reheat the beef until hot, toast the slider rolls, add the provolone, and assemble the sandwiches.
Smoked Chuck Roast BBQ Sliders for Game Day
The finished sliders were fantastic. The smoky beef, barbecue sauce, melted provolone, and sweetness of the Hawaiian rolls made a spectacular sandwich!
The Monument Denali 605 did a great job smoking the chuck roast. Paired with the Monument smoker box, it gave the beef plenty of smoke flavor and developed a nice bark, all on a gas grill.
Not bad for a tailgate sandwich!
Recipe
Smoked Chuck Roast BBQ Sliders
Smoked chuck roast, chopped or shredded and tossed with barbecue sauce, served on Hawaiian slider rolls with melted provolone cheese.
Yield: Approximately 16–20 sliders (estimated)
Method: Indirect smoking
Equipment: Gas grill, smoker box, meat thermometer, disposable foil pan, aluminum foil
Ingredients
For the smoked chuck roast:
1 boneless beef chuck roast (approximately 4 1/2 pounds)
Steven Raichlen’s Texas Brisket Rub (or your favorite barbecue rub), enough to generously season the roast
Wood chips, for smoking
1 cup beef broth
2 tablespoons Worcestershire sauce
1 tablespoon jarred minced garlic
1 teaspoon onion powder
For the sliders:
16–20 Hawaiian slider rolls
Your favorite barbecue sauce, to taste
Sliced provolone cheese, enough for each slider
Instructions
Season the beef: Generously season the chuck roast on all sides with Steven Raichlen’s Texas Brisket Rub.
Set up the grill: Prepare the gas grill for indirect smoking at approximately 250°F. Fill the smoker box with wood chips and position it over an active burner according to the manufacturer’s instructions.
Smoke the chuck roast: Place the roast over indirect heat and close the lid. Maintain a grill temperature near 250°F, replenishing the wood chips as needed. Smoke until the roast develops a dark bark and reaches an internal temperature of approximately 165°F.
Cover the roast: Transfer the chuck roast to a disposable foil pan. Add the beef broth, Worcestershire sauce, minced garlic, and onion powder. Cover the pan tightly with aluminum foil.
Finish the roast: Return the covered pan to the grill over indirect heat. Continue smoking at approximately 250°F. When the internal temperature reaches 205°F, begin checking for tenderness. The beef is ready when a temperature probe or skewer slides into the thickest part with very little resistance.
Rest and chop: Remove the roast from the grill and let it rest for 20–30 minutes. Chop or shred the beef, reserving some of the pan juices.
Add the barbecue sauce: Toss the beef with enough barbecue sauce to coat it. Add a little reserved pan liquid if needed to keep the meat moist.
Prepare the slider rolls: Split the Hawaiian slider rolls and lightly toast them on the grill. Place a portion of BBQ beef on each bottom bun and top with provolone cheese. Warm briefly until the cheese melts.
Assemble and serve: Replace the top buns and serve warm.
Make-Ahead Tailgating Tip
Prepare the smoked chuck roast the day before the game. Refrigerate the chopped or shredded beef with some of the reserved pan juices in a covered container. On game day, reheat the beef thoroughly to 165°F, adding reserved liquid as needed to keep it moist. Toss with barbecue sauce and assemble the sliders shortly before serving.
A big thank you to Monument Grills for sponsoring this post.
Plan your next cook with our full recipe collection—weeknight grills, weekend projects, and special-occasion feasts.
Get Steven’s weekly grilling tips, seasonal recipes, and live-fire ideas in your inbox. Join our Up in Smoke newsletter. Sign up and get a FREE PDF of Steven Raichlen's Best Ribs Recipes Ebook.
Preorder Man On Fire — A Steven Raichlen Memoir. And get some really cool rewards!
Looking to upgrade your tailgating setup? Check out our Tailgating Essentials.
The post Big Beef Flavor, Little Buns: Smoked Chuck Roast Sliders appeared first on Barbecuebible.com.
https://barbecuebible.com/2026/10/20/smoked-chuck-roast-bbq-sliders/
#chuckroast #beef #smokedchuck #monumentdenali #sliders #flavor #bbq #smoking
#rss #feeds #linksharing #qwibbit
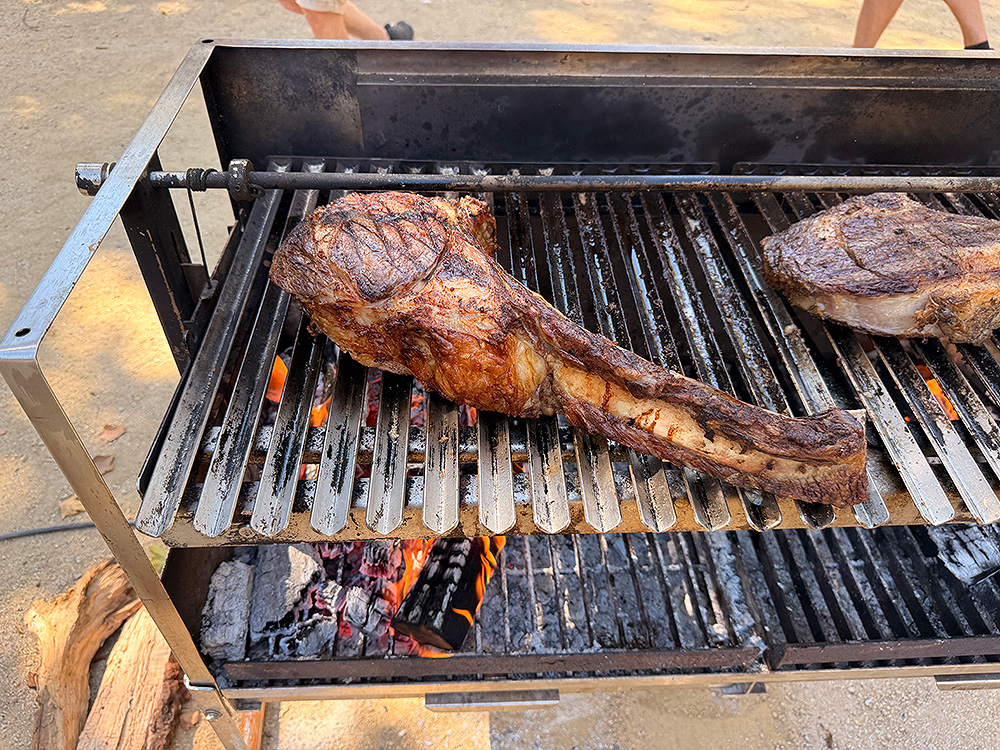
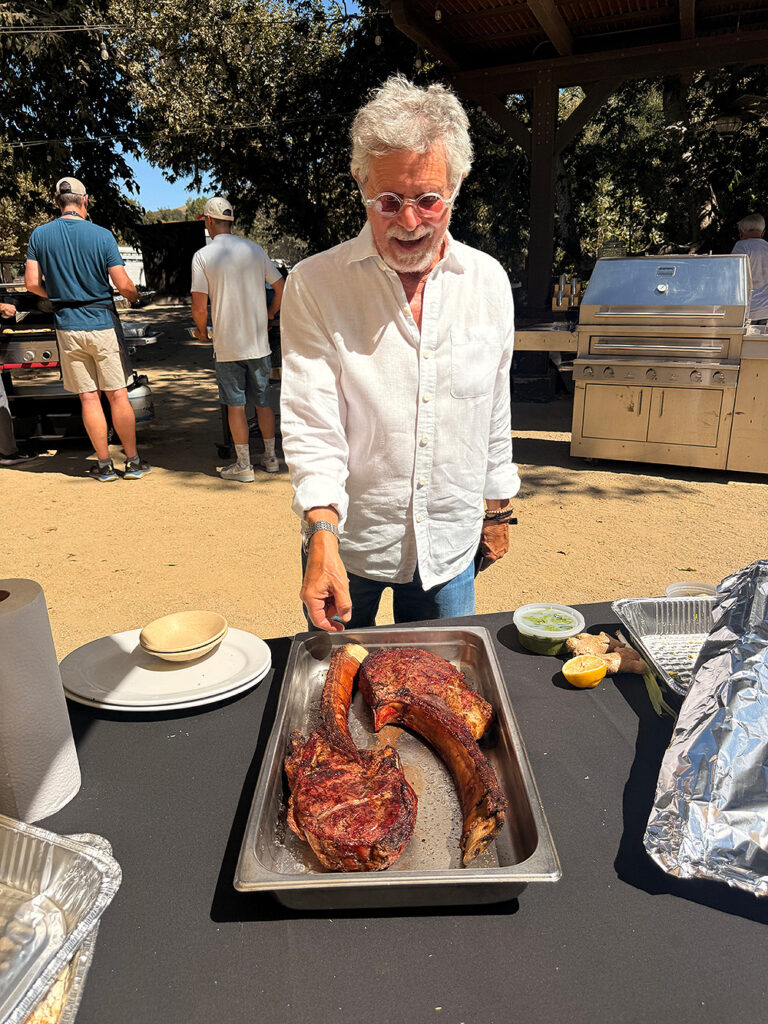
Beef Tomahawk 101
When I started writing about barbecue, a tomahawk was an Indian ax. No one had heard of beef tomahawks.
Today, you can’t go to a steakhouse—or even your local supermarket—without being tempted by this magisterial cut of beef. The beef tomahawk has become the new steak status symbol—one restaurant in Miami even serves it clad with gold leaf. (You don’t want to know the price.)
Given beef prices these days, a beef tomahawk is definitely a splurge, but for a special occasion, you may just want to sizzle one on your grill.
What Is a Beef Tomahawk?
So what is a beef tomahawk? In a nutshell, it’s a bone-in ribeye steak with the entire rib bone attached. (In butcher speak, it’s IMPS/NAMP Number: 1103B.). Often that rib bone is “frenched,” that is scraped clean of meat. Picture a monster steak, 2 to 3 inches thick, with a bone that extends 5 to 8 inches. For all you meat geeks out there, know that tomahawks are cut from ribs 6 through 12 on a steer’s ribcage.
A steak this size presents the griller with several challenges. Try direct grilling it, as you would a regular rib steak or rib-eye, and you wind up burning the exterior, while leaving the center cold and raw. Try smoking it, as you would a brisket, and you miss out on a sizzling seared crust.
No, a beef tomahawk requires a special technique for cooking it to perfection and that technique is, drumroll please, reverse searing.
How to Reverse Sear a Beef Tomahawk
In a nutshell, you start cooking the steak low and slow, as you would true barbecue, like Texas brisket. Once the center reaches an internal temperature of 100 degrees, you take the steak off and rest it on a wire rack over a sheet pan. Raise your grill heat to high to sear the steak on the outside and direct grill it to the desired doneness.
Reverse-searing has several benefits: the meat cooks evenly from top to bottom (no more blood-red “bullseye” in the center, and the timing is a lot more forgiving because you can do most of the cooking ahead of time. Add wood chunks or chips to the fire to give your steak the smoky flavor of barbecue. That’s always a big win in my book.
Two Other Ways to Grill a Beef Tomahawk
Note: There are two other ways to grill a beef tomahawk. If you have a grill with a raisable and lowerable grate (like a Santa Maria-style grill or KUDU), position it high (18 inches) above the fire. Direct grill your steaks slowly, turning every few minutes. Lower the grate the last few minutes to lay on a crusty sear. The cooking time will be 20 to 30 minutes.
Alternatively, if you have a large grill, set it up for direct grilling, one side on medium-high and one side on low. Start the steak on high, then when the surface begins to sizzle and brown, slide it to the low zone. Keep sliding it back and forth between the hot zone and cool zone. The Kalamazoo Outdoor Gourmet company calls this the “sear and slide” method. The cooking time will be 20 to 30 minutes.
Recipe
The Raichlen Beef Tomahawk
By Steven Raichlen
Yield: Serves 2 to 3
Ingredients
1 beef “tomahawk” (rib steak with long rib bone attached and dry-aged, if possible) or very thick ribeye, 24 to 30 ounces and 2-1/2 to 3 inches thick
Coarse salt (kosher or sea) and coarsely and freshly ground black pepper
Cowboy Butter or other compound butter
Cowboy Butter
8 oz. (organic) butter, unsalted (2 sticks)
1 tsp smoked sea salt
2 tsp smoked paprika
4 garlic cloves, minced
1 shallot, small, minced
Zest from 1 lemon
Juice from 1 lemon
2 tablespoons fresh parsley, chopped
2 tablespoons fresh chives, finely chopped
1 tablespoon thyme, stems removed
1/4 teaspoon pepper
Instructions
Very generously season the beef tomahawks on both sides with salt and pepper. Set up your grill for indirect grilling and heat to medium-low (250 degrees). Brush or scrape the grill grate clean and oil it well.
Arrange the tomahawks on the grate away from the heat. Add wood chunks or chips to the fire. Smoke-roast the steak to an internal temperature of about 100 degrees. This will take 40 to 60 minutes.
Transfer the steak to a wire rack over a rimmed sheet pan and let rest for 10 minutes. Meanwhile, set up your grill for direct grilling and heat to high.
Arrange the tomahawk steak over the hottest part of the grill grate, running diagonal to the bars of the grate. Direct grill until both sides are sizzling, browned, and crusty, 2 to 4 minutes per side. You want a final internal temperature of 120 to 125 degrees for rare; 130 to 135 degrees for medium-rare; or 140 to 145 degrees for medium. If the exposed parts of the rib bone start to burn, slide a sheet of aluminum foil under it.
Transfer the tomahawk to a cutting board or warm platter. Carve the beef off the bone and cut into 1/4-inch-thick slices for serving. Top with Cowboy Butter (if desired), following the recipe below.
Cowboy Butter Instructions
Before grilling your steaks, let’s start by making the compound butter.
Let butter come to room temperature. Combine all ingredients with a stick blender or a food processor. Roll butter onto a large piece of plastic wrap forming a log. Roll the plastic wrap up into a log and twist on the ends. Store in the refrigerator until it is time to use.
Plan your next cook with our full recipe collection—weeknight grills, weekend projects, and special-occasion feasts.
Get Steven’s weekly grilling tips, seasonal recipes, and live-fire ideas in your inbox. Join our Up in Smoke newsletter. Sign up and get a FREE PDF of Steven Raichlen's Best Ribs Recipes Ebook.
Preorder Man On Fire — A Steven Raichlen Memoir. And get some really cool rewards!
Looking to upgrade your tailgating setup? Check out our Tailgating Essentials.
The post Beef Tomahawk 101 appeared first on Barbecuebible.com.
https://barbecuebible.com/2026/10/16/how-to-grill-a-tomahawk-steak/
#beeftomahawk #grill #sear #tomahawknote #direct #otherways #nampnumber #reverse
#rss #feeds #linksharing #qwibbit
#beeftomahawk
#grill
#sear
#tomahawknote
#direct
BBQNotes15d
Baconpalooza: 9 Ways to Grill With Bacon
“…bacon is in its terminal stage, clinging to relevance, grasping at any opportunity to cash in on its dwindling cachet as its 15 minutes come to an end.”
So wrote Seattle journalist Erica C. Barnett in May 2009, in the alternative newspaper The Stranger.
Well, Ms. Barnett, you got it wrong. Time to eat crow, preferably wrapped in a bacon weave.
Yes, cured and smoked pork belly is still one of America’s favorite flavors, an exceedingly popular meat at supermarkets and butcher shops from coast to coast. At breakfast it sits beside eggs, toast, pancakes, or potatoes. On a hamburger it contributes smoke and crunch. Wrapped around vegetables, chicken, fruit, or scallops, its rendering fat bastes whatever lies beneath it. Crumbled over salads or soups, a small amount can flavor an entire dish. Even bacon fat itself becomes an ingredient, carrying its smoky character into eggs, beans, cornbread, vegetables, gravies, stews, and sauces.
“Fry” it on your outdoor grill or griddle and avoid messy spatters and lingering odors.
Here are our favorite ways to enjoy this versatile meat.
Make a Bacon Weave
Have you yet to try the impressive bacon weave, a savory cloak that elevates meatloaf, pork loin, and the Thanksgiving turkey?
If not, find concise directions and tips for success here. It’s easy and is guaranteed to impress friends and family.
Make Bacon Jam
We read that 69 percent of U.S. restaurants feature bacon on their menus, some in the form of bacon jam.
It’s a bougie condiment you can make yourself. Find the recipe for Bacon Jam here.
Make Bacon Bourbon
Bacon isn’t limited to the plate. You can even put it in your glass.
Our Bacon Bourbon uses rendered bacon fat to infuse bourbon with smoke. Sip it straight or use it for Manhattans and Old Fashioneds. Better still, garnish the cocktail with a strip of bacon.
Bacon-Wrapped Onion Rings
Wrap thick slices of sweet onions with thin-cut bacon for a porky twist on onion rings.
Bacon on a Stick
Thread bacon on bamboo skewers and grill at 375 degrees for 8 to 10 minutes per side, or until done to your liking.
Serve with burgers or other grilled sandwiches. These also make good stir sticks for Bloody Marys.
Bacon-Wrapped Corn
Spiral bacon slices around ears of sweet corn.
Bacon-Wrapped Fruit
Wrap wedges of fruit—peaches, cantaloupe, or pears—with bacon and grill to your liking.
Make Onion Bombs
Follow our directions for Onion Bombs—a blessed marriage between onions, bacon, and ground meat.
Make Your Own Bacon
Make your own bacon! It’s easier than you think and can be on your table in as little as two days.
Photo: Steve Nestor
Our 48-hour homemade bacon method shows you how.
Explore more at BarbecueBible.com in our Recipe Index.
For new posts and recipes, join the Up in Smoke newsletter. Sign up and get a FREE PDF of Steven Raichlen's Best Ribs Recipes Ebook.
Preorder Man On Fire — A Steven Raichlen Memoir. And get some really cool rewards!
Looking to upgrade your tailgating setup? Check out our Tailgating Essentials.
The post Baconpalooza: 9 Ways to Grill With Bacon appeared first on Barbecuebible.com.
https://barbecuebible.com/2026/09/11/baconpalooza-ways-to-grill-with-bacon/
BBQNotes15d
Kick Off Tailgating Season with Rotisserie Tri-Tip
Photo Credit: Daniel Hale
By Daniel Hale
With football season fast approaching, it’s time to make my first tailgating meal. Being from California, I have to go with tri-tip!
A few years ago, I wrote about my first real attempt at grilling tri-tip. I cooked it indirectly on my Weber kettle, then finished it over direct heat for that amazing sear.
This time I wanted to take the same cut in a different direction. I decided to put a Santa Maria-style tri-tip on the rotisserie.
And what better grill to use than the Monument Eminence 605? This is a big grill. This isn’t something I’m throwing in the back of the car and hauling to a stadium parking lot. This was game-day cooking at home.
Rotisserie Tri-Tip on the Eminence 605
I started with Steven’s Santa Maria Tri-Tip recipe, seasoning the meat with coarse salt, black pepper, garlic powder, and dried rosemary. The tri-tip started at about 3 1/2 pounds before I trimmed a fair amount of exterior fat.
Photo Credit: Daniel Hale
Once the meat was secured on the rotisserie spit, I set up the Eminence 605 for indirect cooking. I lit the burners on either side of the meat and left the burners directly below the tri-tip off. The grill settled in around 285 to 290°F.
The rotisserie kept the tri-tip turning steadily without any flipping or repositioning. After about 45 minutes, the deepest part of the roast had reached 117°F.
Finishing with the Infrared Rear Burner
The Monument Eminence 605 includes a rear infrared burner designed to work with the rotisserie. The rear burner is either on or off rather than adjustable like the main burners.
Photo Credit: Daniel Hale
I turned on the infrared rear burner and kept the rotisserie running. The added radiant heat browned the outside while I watched the internal temperature closely.
I wanted medium-rare, so I pulled the tri-tip when the deepest part reached 130°F and let it rest before slicing. The finished meat had a pink center and a browned, rosemary-flecked exterior.
Tri-tip has grain that changes direction, so I separated the roast as needed and sliced each section across the grain. The method was different from my previous tri-tip cook, but the temperature strategy was familiar: cook it gently first, then use higher heat to finish the exterior.
Santa Maria-Style Sides on the Grill
A Santa Maria-style tri-tip called for the traditional supporting cast, so I also made Steven’s Santa Maria Garlic Bread and Santa Maria Pinquito Beans.
I made a couple of changes to the beans. Instead of pinquito beans, I used Frijoles Colorados Cortos (small red beans). I also substituted chipotle sauce for the red chile sauce. Other than that, I followed the recipe.
Photo Credit: Daniel Hale
I cooked the beans in a saucepan on the Eminence 605’s side burner while the tri-tip was on the rotisserie. Bacon, ham, onion, garlic, tomato purée, chipotle sauce, and the seasonings all went into the pot with the beans.
For the garlic bread, I followed the Santa Maria Garlic Bread recipe. I grilled the bread at the end of the cook while the rest of the meal was coming together.
Photo Credit: Daniel Hale
That gave me the full game-day menu: rotisserie tri-tip, Santa Maria-ish beans, and Santa Maria grilled garlic bread.
The Results
The tri-tip came out beautifully, with a pink center and a browned exterior from the infrared finish. The rosemary really came through in the Santa Maria seasoning and gave the beef a distinct herbal note without covering up the flavor of the meat. I especially liked what the chipotle sauce did for the beans, adding a deeper smoky flavor and a little heat. And the garlic bread may have been the surprise of the meal. Grilled until crisp around the edges and loaded with garlic butter, it was excellent alongside the tri-tip and beans.
Game Day at Home
I’ve now cooked tri-tip a few different ways, and the rotisserie gave me another one worth keeping. The Eminence 605 handled the slow roast, the infrared rear burner handled the finish, and the side burner gave me a place to cook the beans at the same time.
Photo Credit: Daniel Hale
For a tailgating-season meal at home, it made good use of the grill without turning dinner into a juggling act.
A big thank you to Monument Grills for sponsoring this cook.
Want to go deeper on the craft? Explore our grilling techniques and how-to guides for ribs, steak, chicken, seafood, and more.
Get Steven’s weekly grilling tips, seasonal recipes, and live-fire ideas in your inbox. Join our Up in Smoke newsletter. Sign up and get a FREE PDF of Steven Raichlen's Best Ribs Recipes Ebook.
Preorder Man On Fire — A Steven Raichlen Memoir. And get some really cool rewards!
Looking to upgrade your tailgating setup? Check out our Tailgating Essentials.
The post Kick Off Tailgating Season with Rotisserie Tri-Tip appeared first on Barbecuebible.com.
https://barbecuebible.com/2026/09/15/rotisserie-tri-tip-tailgating/
Welcome to BBQNotes spacestr profile!
About Me
Barbecue, smoke, and serious attention to dinner. Unofficial automated fan RSS; source recipes and images belong to their owners. Unofficial fan feed; not affiliated with source publishers.