How to Make an Origami Crystal Ornament
Let’s fold this origami crystal ornament, designed by Robert Neale.
This small octahedron is made up of eight triangular faces, with a sharp point at the top and bottom. Each face combines two colors, creating a pattern that shifts as you turn the model in your hand, a little like the facets of a cut gem.
Difficulty: Easy – Beginner level 3
Folding time: 10 minutes
Early Access for Origami Friends
Want to fold this model today? It’s available right now for Origami Friends before it’s released to everyone.
Support Origami.me and get instant access, plus the full PDF library, early releases, partner discounts, and an ad-free site.
Unlock early access with Origami Friends
$2/month · cancel anytime
Already an Origami Friend? Unlock the full tutorial →
Not ready to fold right now?
The Crystal Ornament will be publicly available in 5 weeks. Leave your email and we’ll let you know when it’s out. You’ll also get a set of printable PDFs right away.
By entering your email, you’ll join the Origami.me newsletter. We’ll send occasional origami updates and never share your email.
Ready to fold now? Try one of these
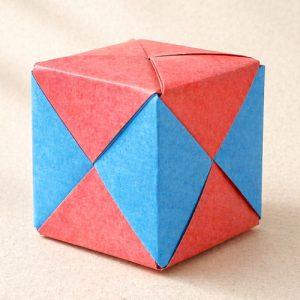
Cube
Spider
5-Pointed Star
Vertigo
&e.target.closest
The post How to Make an Origami Crystal Ornament appeared first on Origami.me.
https://origami.me/crystal-ornament/
#crystalornament #origamicrystal #origamifriends #make #robertneale #access #early #starvertigo #cubespider #unlock
#rss #feeds #linksharing #qwibbit
How to Make an Origami Persimmon
Let’s learn how to fold this traditional origami persimmon.
It’s a round, chunky little fruit with four bright green leaves spread flat across the top, just like the cap on a real persimmon. The orange side of the paper becomes the fruit, and the green side becomes the leaves, all from one square.
Difficulty: Easy – Beginner level 3
Folding time: 10 minutes
Early Access for Origami Friends
Want to fold this model today? It’s available right now for Origami Friends before it’s released to everyone.
Support Origami.me and get instant access, plus the full PDF library, early releases, partner discounts, and an ad-free site.
Unlock early access with Origami Friends
$2/month · cancel anytime
Already an Origami Friend? Unlock the full tutorial →
Not ready to fold right now?
The Persimmon will be publicly available in 4 weeks. Leave your email and we’ll let you know when it’s out. You’ll also get a set of printable PDFs right away.
By entering your email, you’ll join the Origami.me newsletter. We’ll send occasional origami updates and never share your email.
Ready to fold now? Try one of these
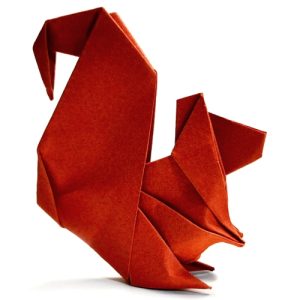
Squirrel
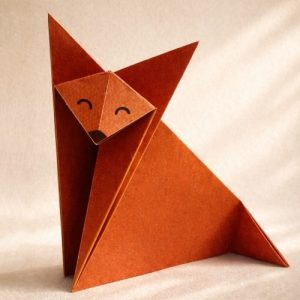
Fox
Vase
Paper Envelope
&e.target.closest
The post How to Make an Origami Persimmon appeared first on Origami.me.
https://origami.me/persimmon/
#origamipersimmon #make #friends #earlyaccess #paper #foxvase #squirrelfox #unlock #paperenvelope #ready
#rss #feeds #linksharing #qwibbit
How to Make an Origami Kusudama Sonobe Star
Let’s learn how to fold this origami kusudama Sonobe star, designed by Mitsunobu Sonobe.
After the Sonobe cube, here’s another modular model you can create using the same Sonobe unit. This version uses 12 units to form a stellated octahedron, but the same principle can be used to build larger models with 30, 90, or even 120 units.
Difficulty: Easy – Beginner level 4
Folding time: 45 minutes
Early Access for Origami Friends
Want to fold this model today? It’s available right now for Origami Friends before it’s released to everyone.
Support Origami.me and get instant access, plus the full PDF library, early releases, partner discounts, and an ad-free site.
Unlock early access with Origami Friends
$2/month · cancel anytime
Already an Origami Friend? Unlock the full tutorial →
Not ready to fold right now?
The Kusudama Sonobe Star will be publicly available in 5 weeks. Leave your email and we’ll let you know when it’s out. You’ll also get a set of printable PDFs right away.
By entering your email, you’ll join the Origami.me newsletter. We’ll send occasional origami updates and never share your email.
Ready to fold now? Try one of these
Ninja Star
Lucky Star
5-Pointed Star
4-Pointed Star
&e.target.closest
The post How to Make an Origami Kusudama Sonobe Star appeared first on Origami.me.
https://origami.me/kusudama-sonobe-star/
#kusudamasonobe #sonobestar #origamikusudama #origamifriends #mitsunobusonobe #make #luckystar #ninjastar #access #early
#rss #feeds #linksharing #qwibbit
How to Make an Origami Ditto
Let’s fold this origami Ditto, designed by Ryan Dong.
At first glance, it looks simple, just a little purple blob with two arms and a drawn face. But the folding is more interesting than the finished model lets on, with quite a bit happening inside to give Ditto its three-dimensional shape.
I’d recommend this one for confident beginners who already have quite a few models behind them. None of the folds are particularly difficult, but you’ll need to pay attention to the layers, especially near the end when locking the hidden flaps into place. Take your time there, and a pair of tweezers can be very helpful.
I folded mine from a 6 × 6 in (15 × 15 cm) sheet of Tant. It holds the shape nicely, and the finished Ditto stands up on its own, perfect for keeping on a desk or shelf.
Origami Ditto Step-by-Step Instructions
Difficulty: Low-Intermediate
Folding time: 15 minutes
Recommended Paper
6 x 6 in (15 x 15 cm) Tant origami paper.
Shop Paper
printable Instructions
Ask Questions
Step 1
Start with the colored side of the paper facing up in a diamond position. Fold and unfold along both diagonals.
Step 2
Turn the paper over.
Step 3
Fold and unfold the paper in half side to side, in both directions.
Step 4
Collapse along the existing creases to form a square base, bringing the left and right corners down to meet the bottom corner.
Step 5
Lift the left flap, open it, and squash-fold it flat.
Step 6
Fold one flap over to the left.
Step 7
Repeat Steps 5 and 6 on the right, then on each remaining flap.
Step 8
Fold the bottom left edge up to the horizontal line between the two side corners, then unfold.
Step 9
Fold the bottom corner up along a horizontal line through the circled point, where the crease you just made meets the vertical centerline.
Step 10
Fold the top corner down to the circled point. Crease firmly.
Step 11
Unfold the paper back to a square, but don’t flatten it completely.
Step 12
Push the center point of the paper upwards.
Step 13
Flatten the paper along the existing creases.
Step 14
Fold the left edge inward to the nearest crease line, then unfold. Repeat with the right edge, then repeat behind.
Folding tip: Next, we’re going to sink the top part. We’ve broken the sink fold into three steps to make it easier to follow. Don’t hesitate to watch the videos if this part feels tricky.
Step 15
Fold the top corner down, letting the layers at the back swing upwards. The paper won’t lie flat until Step 18.
Step 16
Fold the left and right sides in along the existing creases.
Step 17
Flatten the paper (top to bottom) along the existing creases.
Step 18
Fold the horizontal crease up to the imaginary line between the two circled corners.
Step 19
Mountain fold the top flap inside the model.
Step 20
Inside-reverse-fold the bottom left corner upwards to the left.
Step 21
Open the layers up along the dashed line, but don’t crease.
Step 22
Fold the two corners in to meet the diagonal crease between them.
Step 23
Close the layers back down.
Step 24
Fold the tip of the arm down to the lower circled point, then unfold.
Step 25
Inside-reverse-fold the tip of the arm along the crease you just made.
Step 26
Open the layers up again along the dashed line, but don’t crease.
Step 27
Tuck the corner underneath.
Folding tip: To make this step easier, fold the small triangle on top of the flap first, then tuck it underneath.
Step 28
Close the layers back down.
Step 29
Repeat Steps 20 to 28 on the right side. The second arm can sit at a slightly different angle to the first.
Note: My first arm ended up quite a bit longer than the second. I left it this way because I thought it matched the character well.
Step 30
Fold the hidden layers together along the existing creases to lock them in place. The circled area shows an x-ray view.
Folding tip: This step can be a little tricky, even though we created the precreases in Step 14. Take your time, and use tweezers if needed to help avoid wrinkles.
Step 31
Repeat Step 30 on the right side.
Step 32
Fold the bottom corner up inside the model so it matches the horizontal edge on the front.
Step 33
Draw a face.
Step 34
Shape the top and bottom edges to make them wavy.
Your Origami Ditto Is Complete
I hope you enjoyed folding Ditto. Shaping is the fun part, and there is no single right answer. The arms do not have to match.
Mine came out with one noticeably longer than the other, and I left it that way, because it suited the character. Try different lengths and angles, and play with how much wave you put into the top and bottom edges. Small changes there give the model a lot of personality.
If you fold one, share a photo in the comments. I would love to see which paper you used.
Want to keep folding? Browse more origami animals, or our intermediate origami tutorials if you want a bigger challenge next. You can also get new tutorials and folding ideas in our newsletter, and if you like folding along with video, subscribe to our origami YouTube channel.
Ditto and Pokémon are the intellectual property of their respective rights holders. This is an unofficial fan-made origami project. Origami.me is not affiliated with, sponsored by, or endorsed by The Pokémon Company, Nintendo, Creatures Inc., or GAME FREAK.
Download the Complete Origami Ditto Printable PDF Instructions
This printable PDF is part of our Origami Friends membership on Patreon. As a member, you get access to these diagrams, our full library of 120+ printable PDFs, and member-only content.
Become an OrigaMi Friend
Need printables licensed for classroom or group use? See the Origami Library for Educators →
The post How to Make an Origami Ditto appeared first on Origami.me.
https://origami.me/ditto/
Origami.me (Unofficial)20d
How to Make Origami Sunglasses
Let’s learn how to fold a pair of origami sunglasses designed by Nick Robinson.
They take about five minutes to make and need nothing more than a sheet of printer paper. Best of all, once you’re finished, you can actually put them on.
The folding sequence is simple and fun, which also makes this a fun model to fold with children.
You can use regular white printer paper, or choose colored paper for a more playful result. I recommend sticking to paper around 80 GSM. Once you get to 90 GSM, the folds become noticeably harder to manage.
Colored 80 GSM paper can be surprisingly difficult to find, so I’ve added a link below to a suitable option.
Origami Sunglasses Step-by-Step Instructions
Difficulty: Easy – Beginner level 2
Folding time: Under 5 minutes
Recommended Paper
8.5 x 11 in (21.6 x 27.9 cm) Letter or 8.3 x 11.7 in (21 x 29.7 cm) A4 printer paper.
Ordinary printer paper works well. Avoid thick paper, which makes the temples difficult to fold.
Shop Paper
printable Instructions
Ask Questions
Step 1
Fold the bottom-left corner up to the top-right corner.
Step 2
Fold the left corner to the bottom corner, then unfold.
Step 3
Unfold the fold from Step 1.
Step 4
Fold the paper in half along the diagonal crease from Step 2, folding from bottom to top.
Step 5
Fold the long bottom edge up along the dashed line, so the edge meets the point where the two raised flaps intersect.
Step 6
Fold the band in half lengthwise, bringing the long bottom edge up to meet the top edge.
Step 7
Fold the band in half lengthwise again, bringing the long bottom edge up to meet the top edge.
Step 8
Fold the top corner of each raised flap down. Try to keep both folds symmetrical.
Step 9
Fold the temple on each side to a 90° angle. Try to keep both sides symmetrical.
Your Origami Sunglasses Are Complete
Put them on and enjoy your stylish paper shades!
Folding tip: The temples may be a little short. If needed, use a rubber band to help keep your sunglasses in place.
I hope you enjoyed folding these origami sunglasses with me today! There is something particularly satisfying about origami you can wear.
If you fold a pair, share a photo in the comments. I would love to see which paper you used.
Want to keep folding? Browse more summer origami, or our easy origami tutorials if you are just getting started.
You can also get new tutorials and folding ideas in our newsletter, and if you like folding along with video, subscribe to our origami YouTube channel.
Download the Complete Origami Sunglasses Printable PDF Instructions
This printable PDF is part of our Origami Friends membership on Patreon. As a member, you get access to these diagrams, our full library of 120+ printable PDFs, and member-only content.
Become an OrigaMi Friend
Need printables licensed for classroom or group use? See the Origami Library for Educators →
The post How to Make Origami Sunglasses appeared first on Origami.me.
https://origami.me/sunglasses/
Origami.me (Unofficial)20d
How to Make an Advanced Origami Skull
Same base, very different result. This advanced skull by Mister Paperfold builds on his easy origami skull with much more detail and shaping.
It has a wide, rounded cranium, large eye sockets, a small triangular nose, and a neat row of teeth along the bottom that gives it its grin. The teeth are probably the trickiest part and take a little patience, so I’d recommend this model for folders who are already comfortable with the basics and looking for a challenge.
If you’ve folded the easy version first, it’s especially fun to see how far the same base can go.
Origami Skull Step-by-Step Instructions
Difficulty: Low-Intermediate
Folding time: 30 minutes
Recommended Paper
8 x 8 in (20 x 20 cm) origami paper (Kami) for a first attempt.
Shop Paper
printable Instructions
Ask Questions
Step 1
Start with the white side of the paper facing up. Fold the paper in half vertically and horizontally, then unfold.
Step 2
Fold and unfold each edge to meet the center creases, creating a 4×4 grid.
Step 3
Fold and unfold each corner to the center point.
Step 4
Fold the top edge down to meet the bottom edge.
Step 5
Fold the top left and right corners down to the circled points, then unfold.
Step 6
Unfold the back layer up to the top.
Step 7
Fold and unfold both diagonals.
Step 8
Collapse the paper along the existing creases to form a Waterbomb base.
Step 9
Fold the top layers up along the existing horizontal crease. At the same time, squash-fold the inner edges flat along the existing creases.
Step 10
On the left side, swivel-fold the top layer to the right along the existing creases.
Step 11
Fold the left edge of the flap to the vertical centerline, sliding it underneath the colored triangle.
Folding tip: Hold the layers firmly to keep them from shifting.
Step 12
Unfold the fold from Step 11.
Step 13
Closed-sink the left edge of the flap along the crease you just made.
Folding tip: You can use an open sink instead if you find it easier.
Step 14
Fold the small bottom corner of the flap up.
Step 15
Fold the flap up.
Step 16
Repeat Steps 10 to 15 on the right side.
Step 17
Rotate the model 180°.
Step 18
Repeat Steps 10, 14, and 15 on the left and right sides.
Step 19
Swivel-fold the bottom-right corner of the left flap upward.
Step 20
Squash-fold the corner to the right.
Step 21
Fold the top half of the flap down along the horizontal line through its points.
Step 22
Inside-reverse-fold the edge upward (top flap only).
Step 23
Fold the right corner over to the left.
Step 24
Inside-reverse-fold the edge upward.
Step 25
Fold the bottom-right corner up to the top-left corner, then unfold. Crease lightly.
Step 26
Fold the bottom edge up to meet the crease you just made.
Step 27
Fold the bottom edge up again, from the bottom-left corner, to meet the other diagonal.
Step 28
Unfold the fold from Step 27.
Step 29
Refold Step 27, but make a small squash fold to bring the colored edge down.
Step 30
Fold the tips of the two corners down.
Folding tip: If you’re using a small paper sheet, tweezers can make this step easier.
Step 31
Repeat Steps 19 to 30 on the right side.
Step 32
Turn the model over.
Step 33
Fold the bottom corners up. The fold line runs between the two circled points.
Step 34
Fold the top edge down to the center of the square, pinching only at the vertical centerline, then unfold.
Step 35
Fold the top left and right corners down to the pinch mark.
Step 36
Fold the top edge down to the circled points.
Step 37
Turn the model over.
Step 38
Mountain-fold a small strip on the left and right sides behind the model.
Your Origami Skull Is Complete
I hope you enjoyed folding this skull with me today!
Paper with a dark color on the back works best here, since the eye sockets and nose come from the colored side. White and black makes the face really stand out.
If you fold one, share a photo in the comments. I would love to see which paper you used.
Want to keep folding? Browse more Halloween origami, or try the easy origami skull if you haven’t folded it yet.
You can also get new tutorials and folding ideas in our newsletter, and if you like folding along with video, subscribe to our origami YouTube channel.
Download the Complete Origami Advanced Skull Printable PDF Instructions
This printable PDF is part of our Origami Friends membership on Patreon. As a member, you get access to these diagrams, our full library of 120+ printable PDFs, and member-only content.
Become an OrigaMi Friend
Need printables licensed for classroom or group use? See the Origami Library for Educators →
The post How to Make an Advanced Origami Skull appeared first on Origami.me.
https://origami.me/skull-advanced/
Origami.me (Unofficial)20d
How to Make an Origami Turkey
Let’s learn how to fold this origami turkey designed by Caleb Witte.
It has a round body, a broad tail fanned out behind, and a small head tucked forward, so the silhouette is simple, easy to recognize, and full of character.
Difficulty: Low-Intermediate
Folding time: 20 minutes
Early Access for Origami Friends
Want to fold this model today? It’s available right now for Origami Friends before it’s released to everyone.
Support Origami.me and get instant access, plus the full PDF library, early releases, partner discounts, and an ad-free site.
Unlock early access with Origami Friends
$2/month · cancel anytime
Already an Origami Friend? Unlock the full tutorial →
Not ready to fold right now?
The Turkey will be publicly available in 4 weeks. Leave your email and we’ll let you know when it’s out. You’ll also get a set of printable PDFs right away.
By entering your email, you’ll join the Origami.me newsletter. We’ll send occasional origami updates and never share your email.
Ready to fold now? Try one of these
Squirrel
Fox
Vase
Paper Envelope
&e.target.closest
The post How to Make an Origami Turkey appeared first on Origami.me.
https://origami.me/turkey/
Origami.me (Unofficial)20d
How to Make an Origami Mushroom
Let’s learn how to fold this origami mushroom designed by Michel Grand.
It has a wide, rounded cap and a short, sturdy stem. The cap shows the colored side of the paper, while the stem shows the white side, giving it a very recognizable mushroom shape.
Difficulty: Easy – Beginner level 3
Folding time: 10 minutes
Early Access for Origami Friends
Want to fold this model today? It’s available right now for Origami Friends before it’s released to everyone.
Support Origami.me and get instant access, plus the full PDF library, early releases, partner discounts, and an ad-free site.
Unlock early access with Origami Friends
$2/month · cancel anytime
Already an Origami Friend? Unlock the full tutorial →
Not ready to fold right now?
The Mushroom will be publicly available in 5 weeks. Leave your email and we’ll let you know when it’s out. You’ll also get a set of printable PDFs right away.
By entering your email, you’ll join the Origami.me newsletter. We’ll send occasional origami updates and never share your email.
Ready to fold now? Try one of these
Squirrel
Fox
Vase
Paper Envelope
&e.target.closest
The post How to Make an Origami Mushroom appeared first on Origami.me.
https://origami.me/mushroom/
Welcome to Origami.me (Unofficial) spacestr profile!
About Me
Paper folding and cheerful creative projects. Unofficial automated fan feed. Content belongs to its respective owners; not affiliated with source publishers.